Sofrito (a Dinner Savior)

Sofrito

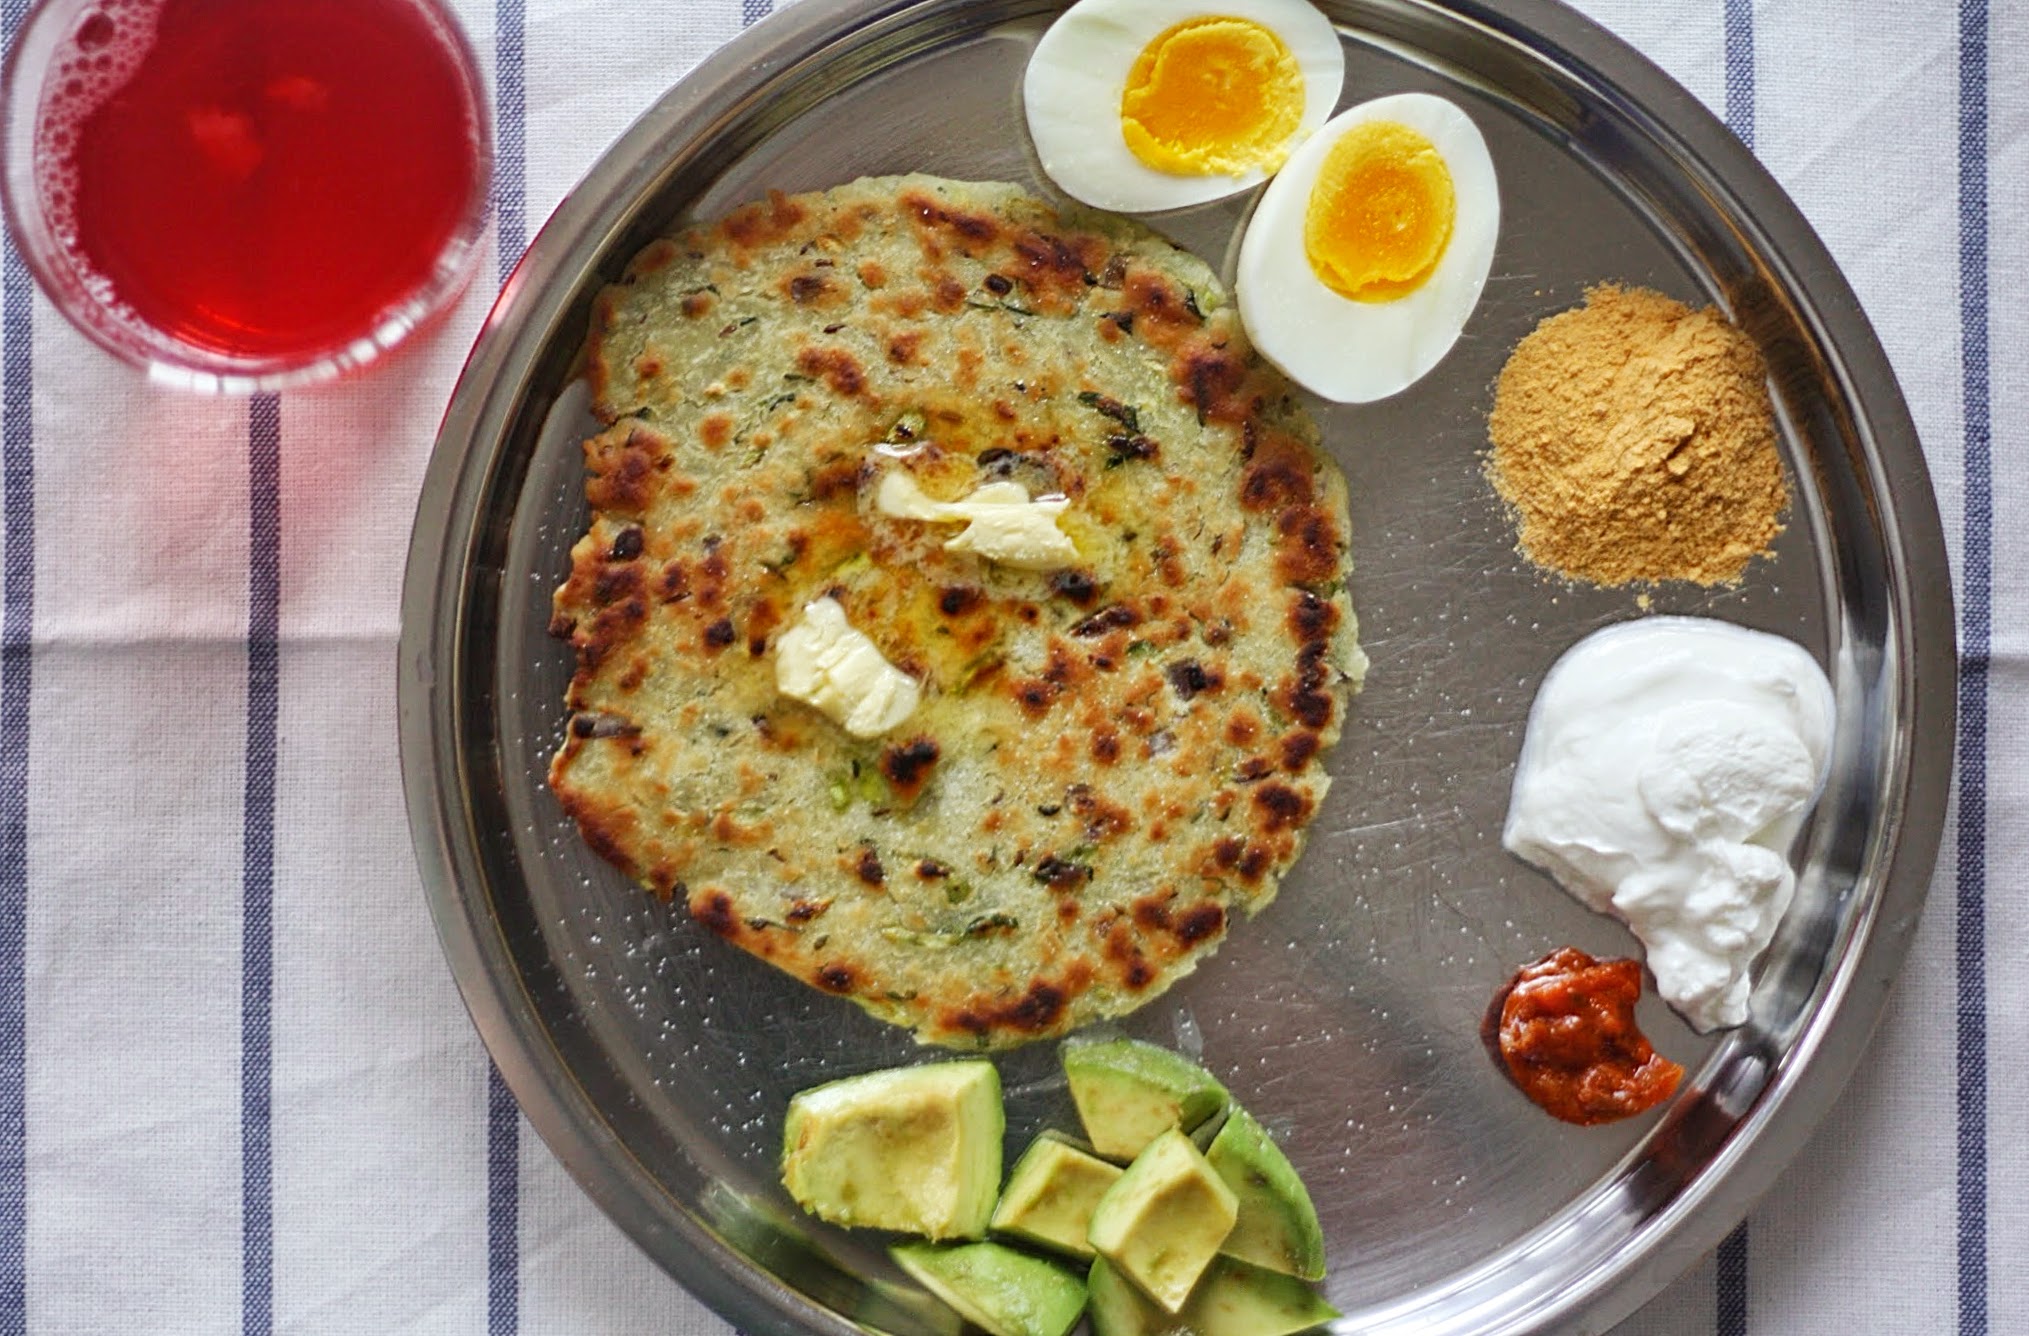
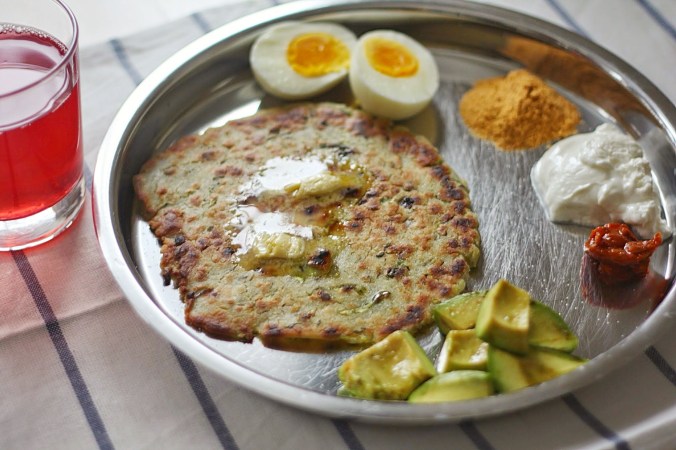
It’s been a busy couple weeks around here. First I came down with some wicked virus that nearly knocked me out cold, then it was Suraj’s birthday (which we celebrated by way of a day-long music concert with friends and this cake), and finally it was off to Austin, TX for a work conference.

The conference was great and I got to meet up with a few of my wonderful authors, but my wallet was lost/stolen the first night we got there, while out exploring, and I’ve spent way too much since then trying to cancel and replace everything. Thankfully, I did make it through airport security sans ID (after some serious TSA questioning and a way-beyond-first-base pat down) and all is back in order now.

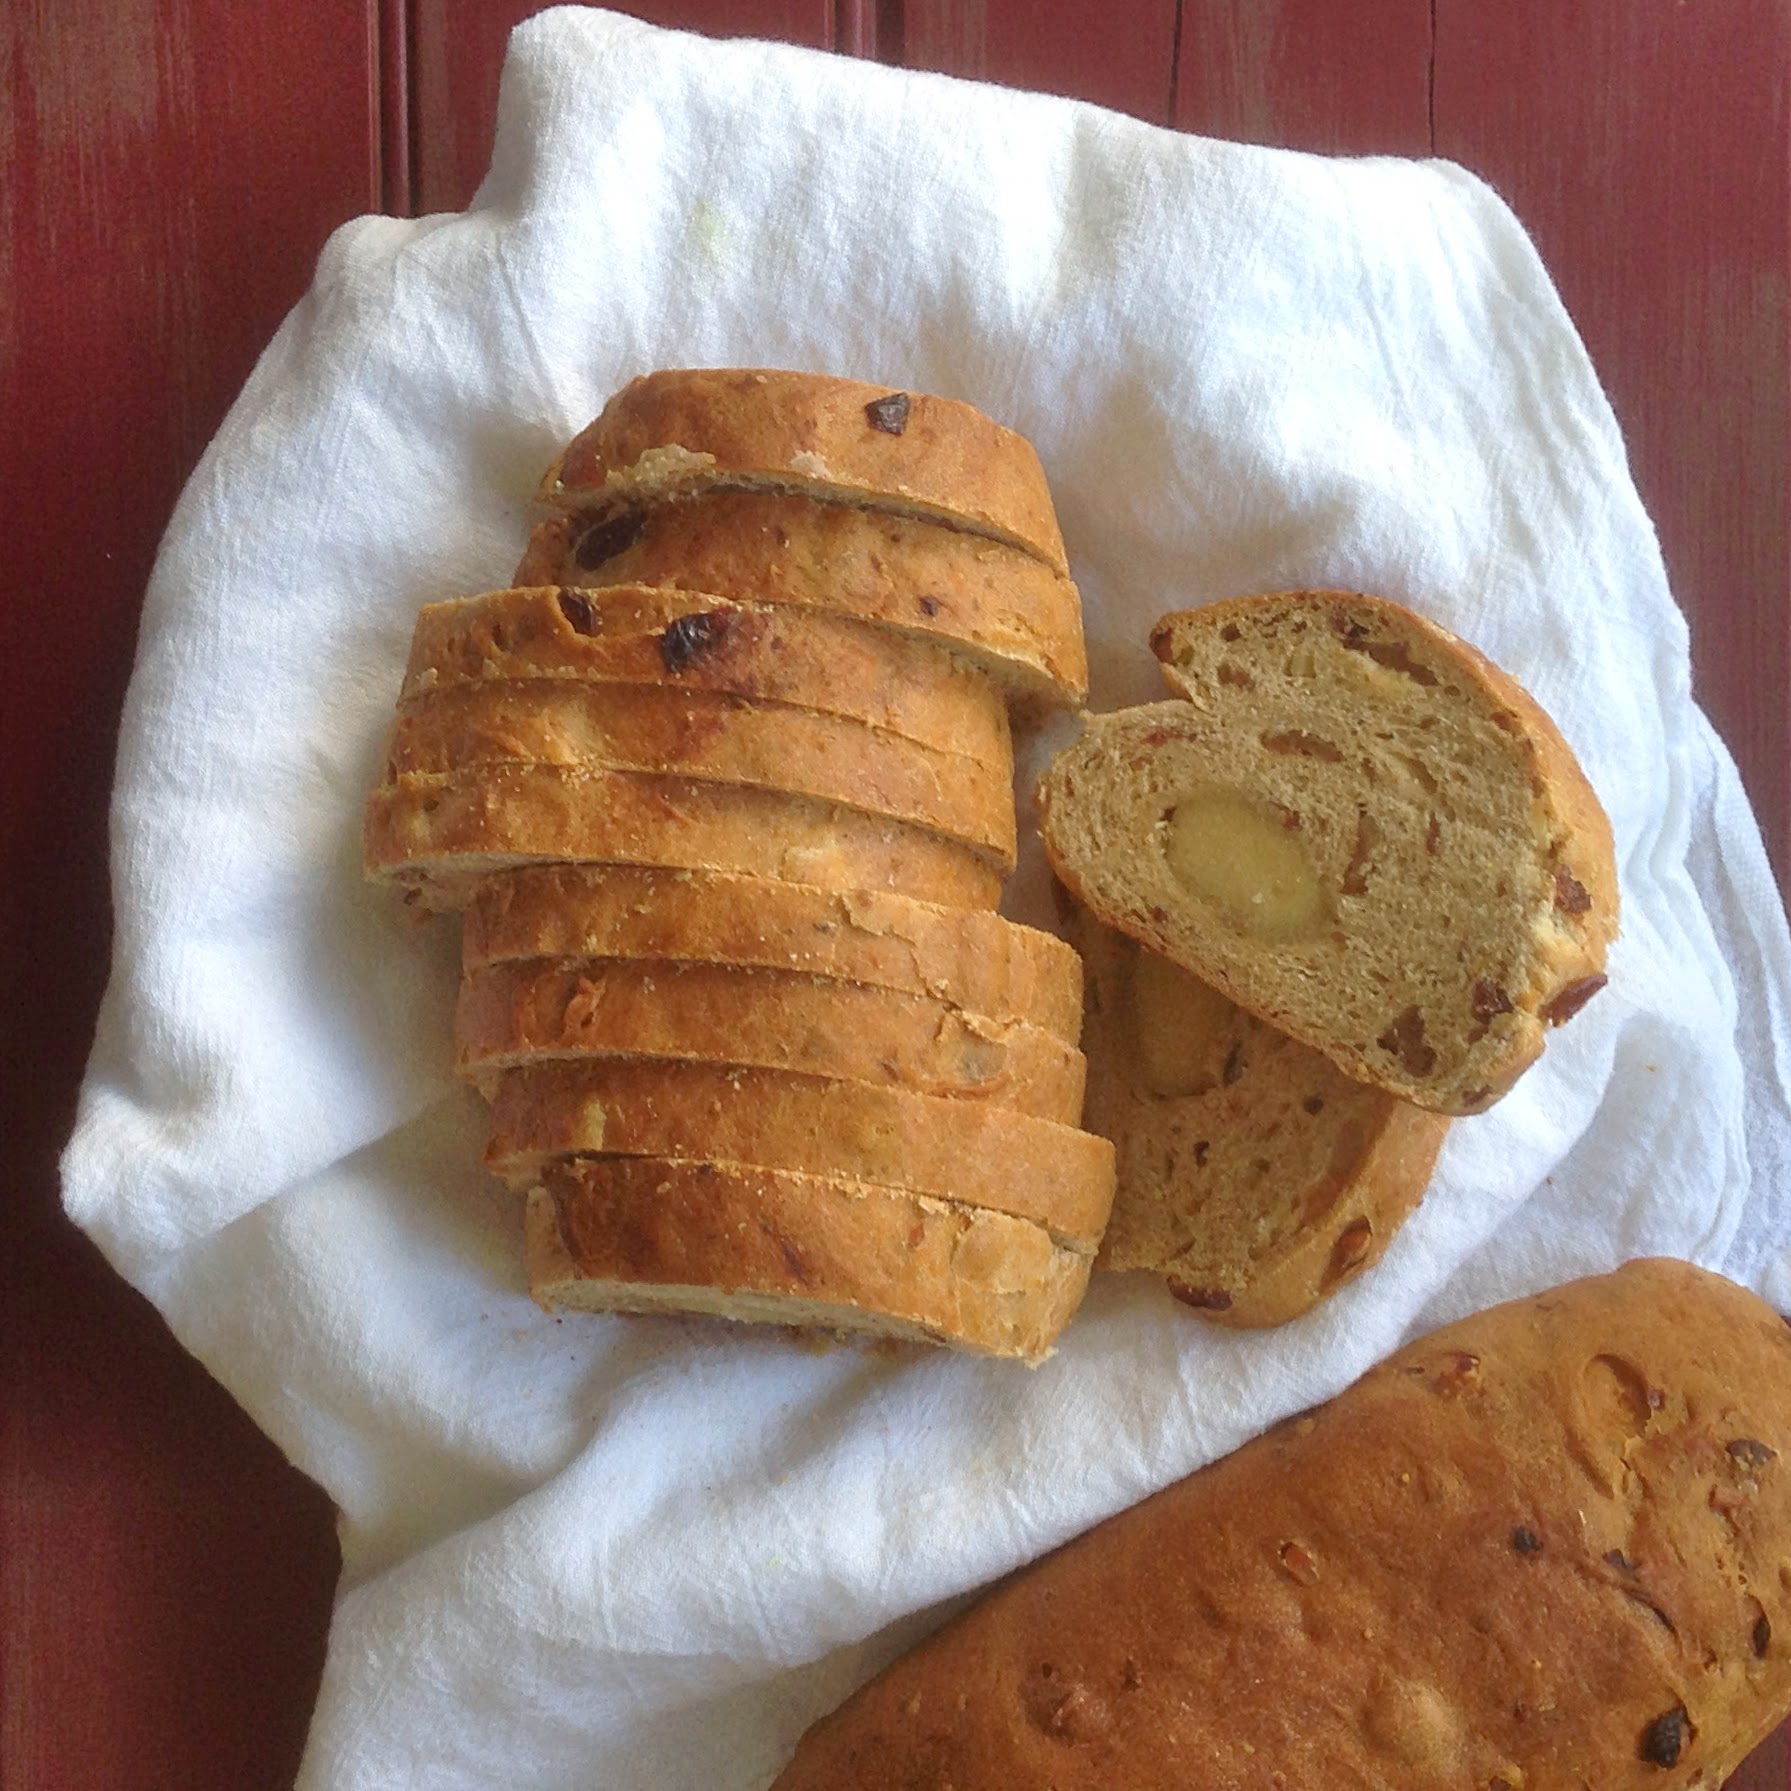
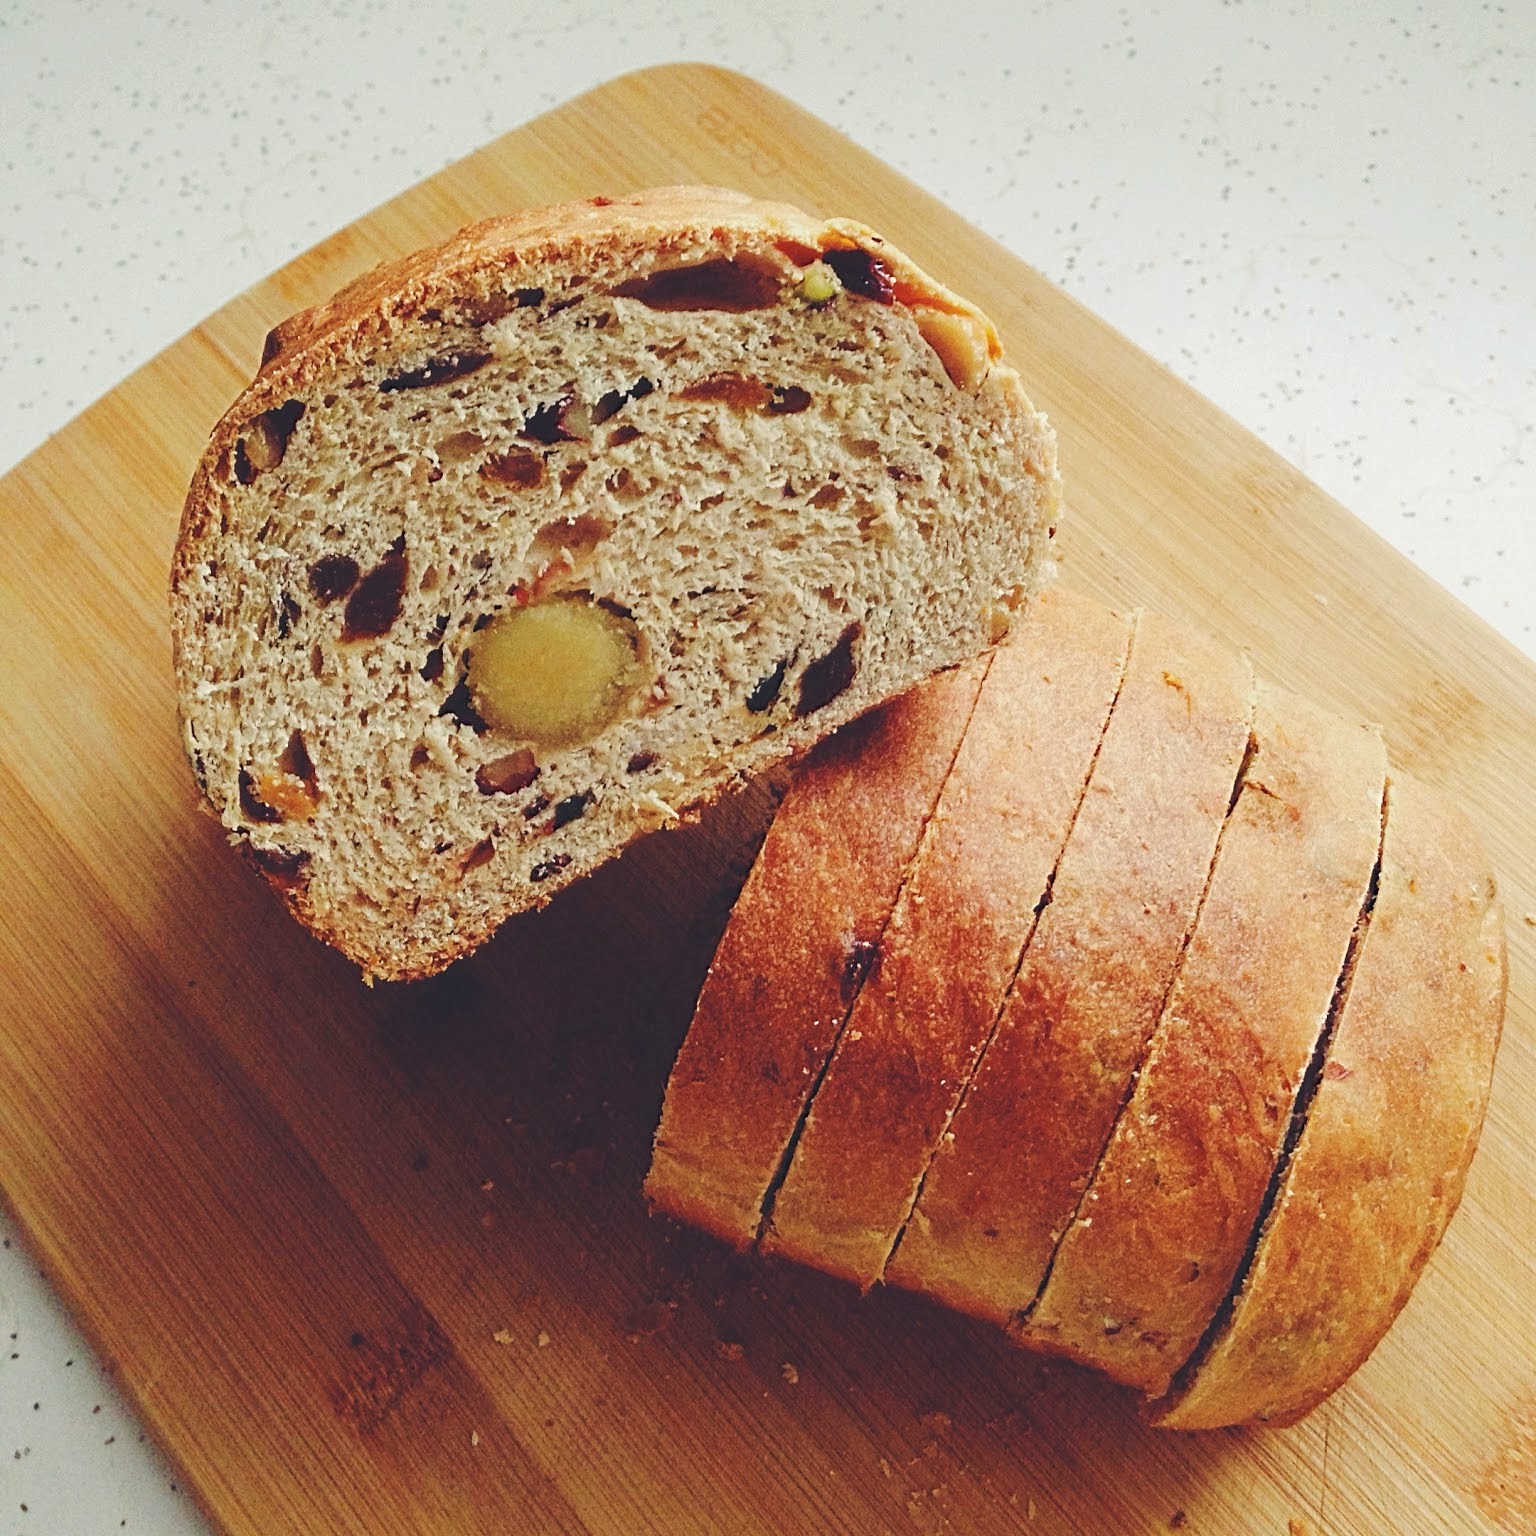
Despite that little setback, Austin was fantastic. The food was amazing, the vibe was welcoming and fun, and the city itself was beautiful. My top food picks, in case you ever plan on visiting, were Homeslice Pizza, Kerbey Lane Café (fried green tomato BLT, oh my), The Salty Sow (we magically got in without reservations, score!), Amy’s Ice Cream, Bangers, and Easy Tiger (amazing breads—I flew home with two loaves). Oh, and I also fell in love with Uber there. SO much better than taxis.

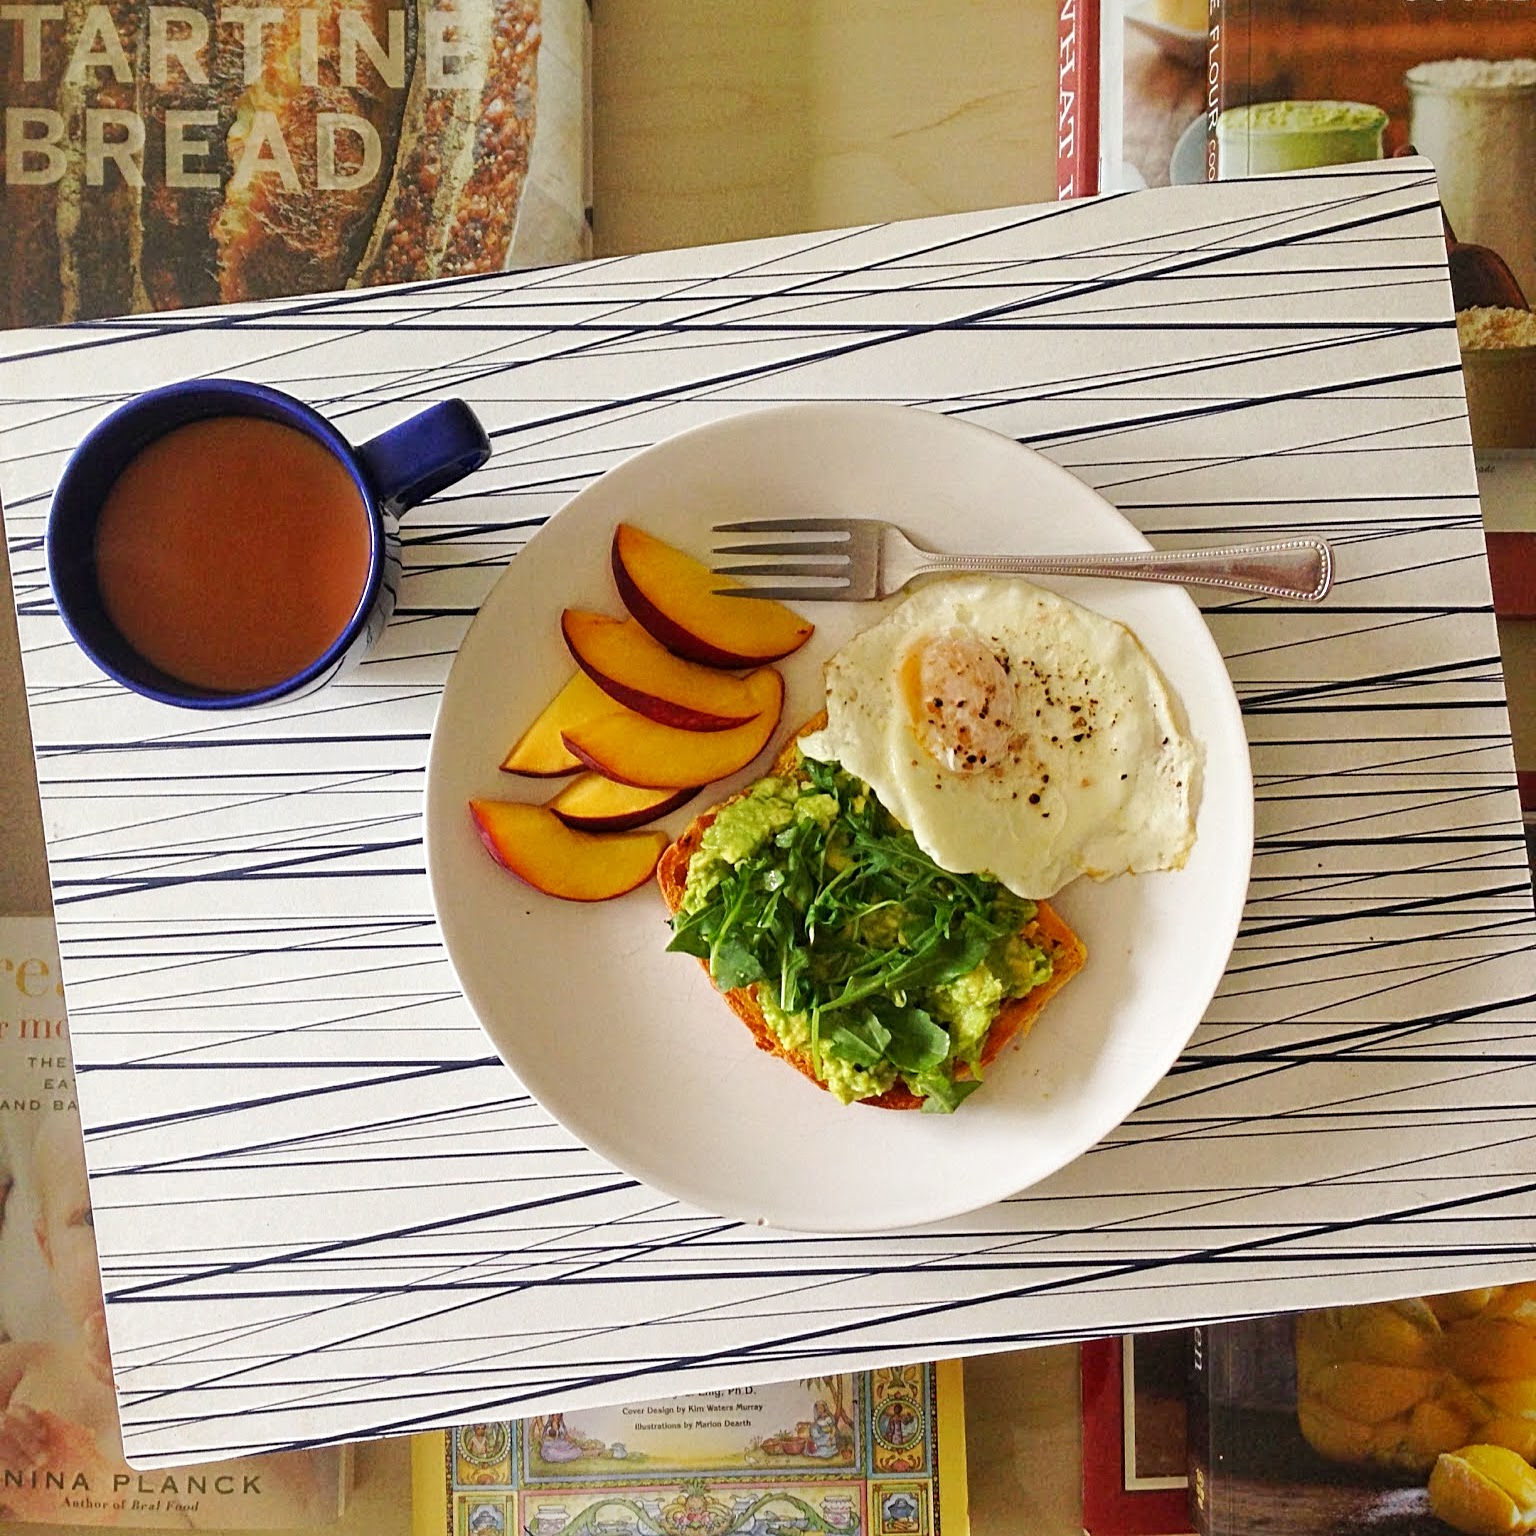
Coming back home from travel, I’m always anxious to get back into the kitchen, but rarely have the energy + groceries to jump in full-steam. That’s where my ultimate back-pocket recipe, aka sofrito, comes in. It is one of my freezer MUST-HAVES.

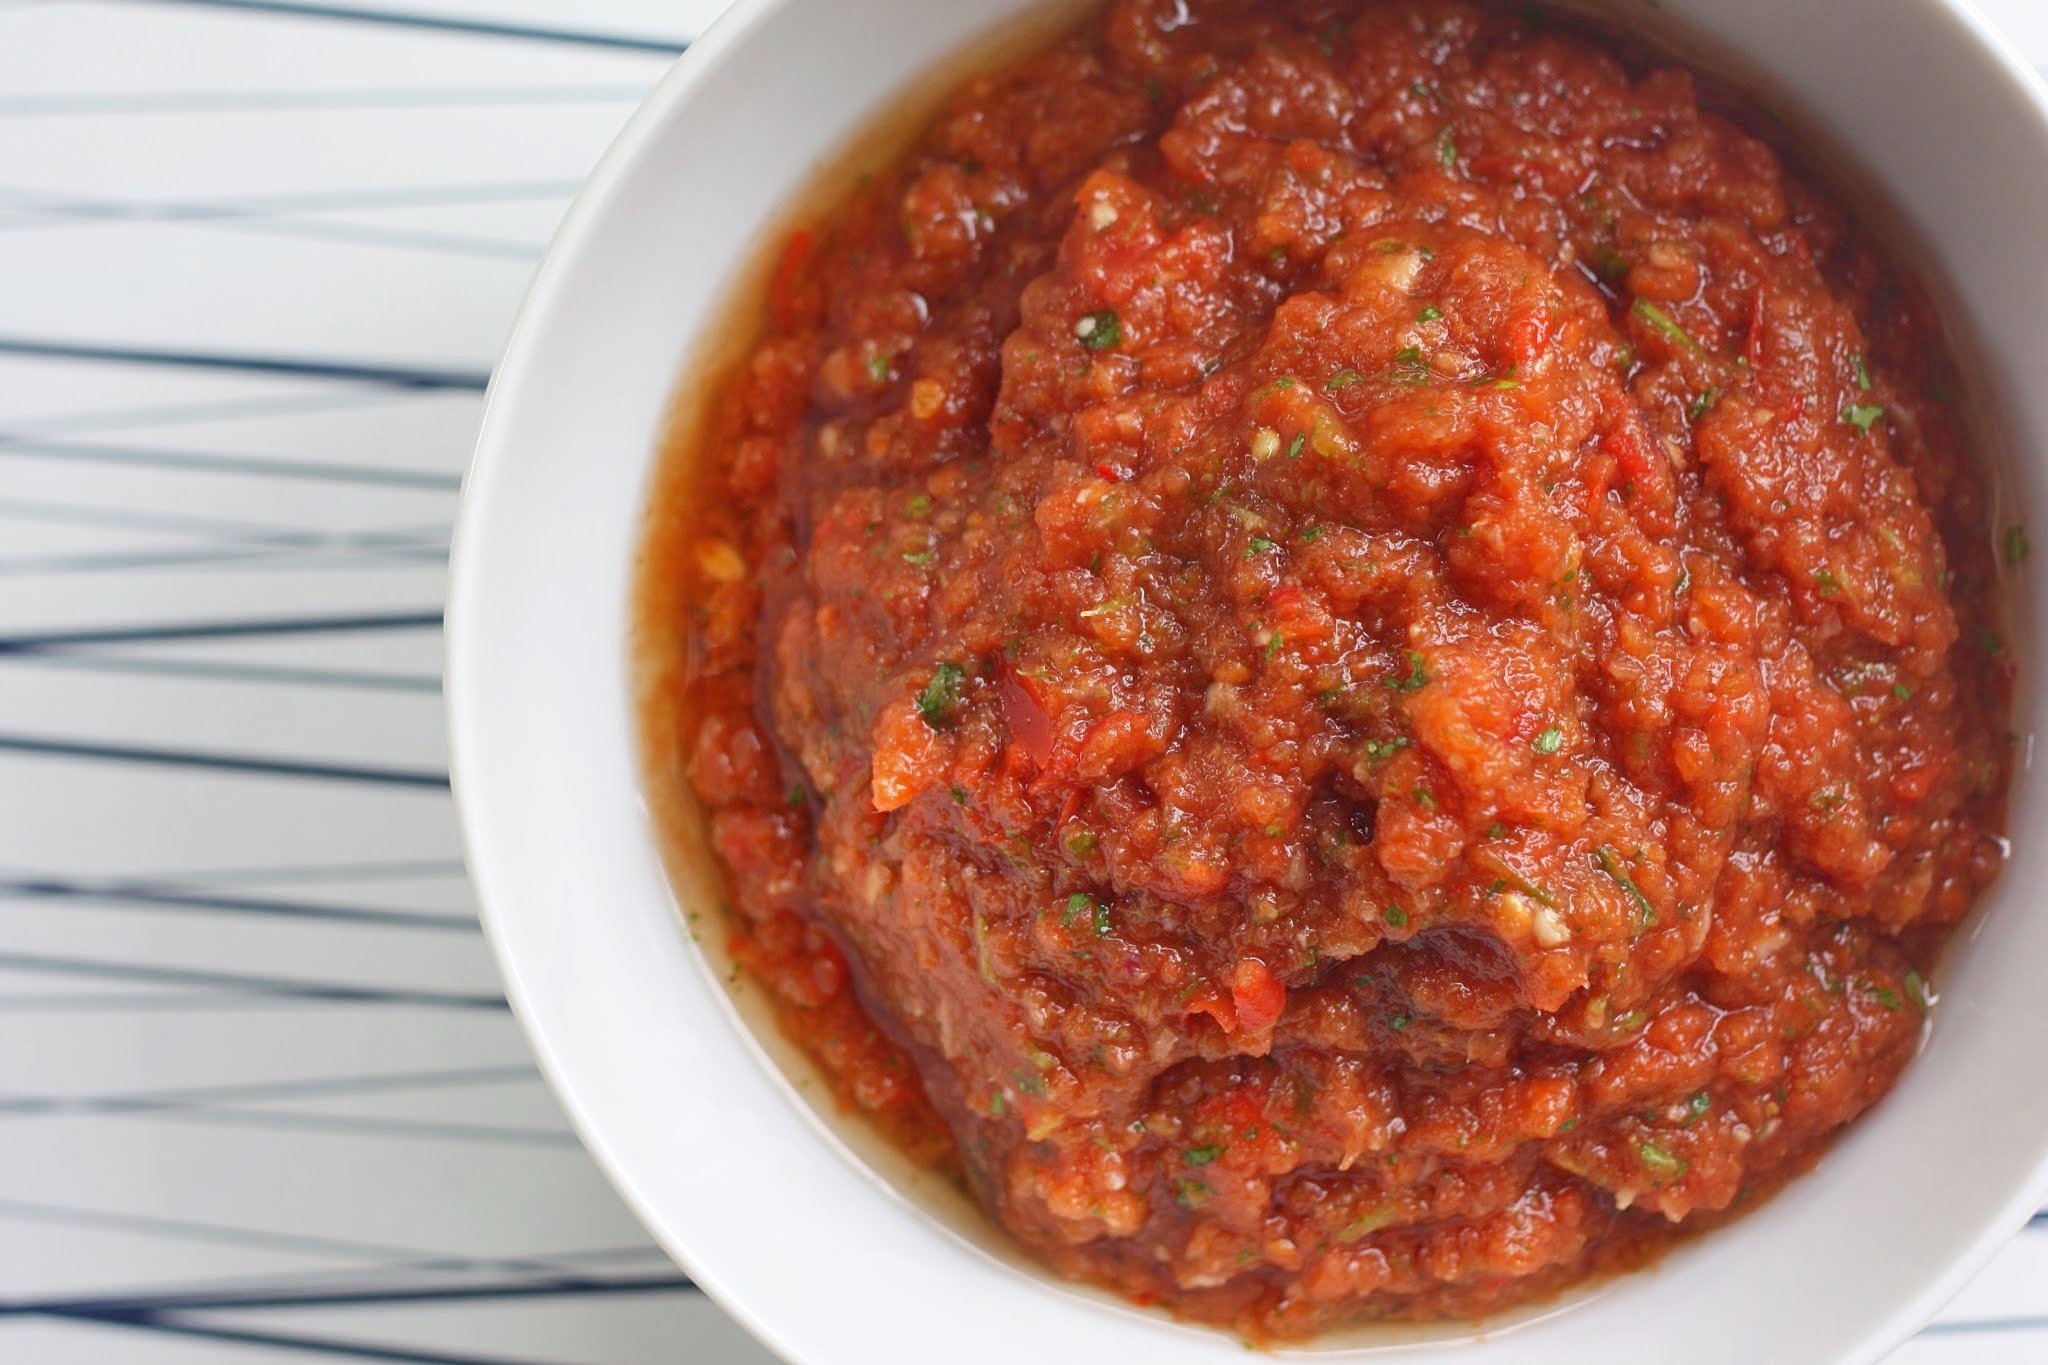
If you’re not familiar, sofrito is a simple Spanish sauce made of vegetables blitzed in a blender—mainly tomatoes, peppers, and onions. It takes almost no time to prepare but is the perfect avenue to any number of flavorful meals. You just heat, add in any meat, seafood, and/or vegetables you like, and serve with rice or pasta.

And just like that, you’re back in the dinner game.

Sofrito Meal

Sofrito
I like to make the full recipe here, then remove half, cool, and freeze in a gallon-size freezer bag (as I did with the broth here). That way I have one meal ready for now, and one I can make later. Along with the sweet bell peppers, we also like to add in a few Indian chilis, which I recommend if you like things hot. I’m sure other herbs like parsley would be welcome as well (this is a great way to use up CSA overflow!). If you’d like to thin down the sauce, just add broth or white wine. // Yield: 4 cups, at least

1 large can (28 oz) peeled plum tomatoes, such as San Marzano
2 red bell peppers (or 1 red + 1 green), roughly chopped
2 medium yellow onions, roughly chopped
5 garlic cloves, smashed and peeled
1 bunch cilantro, stems included
2 teaspoons kosher salt, plus more to taste
1/3 to 1/2 cup extra-virgin olive oil

Combine all ingredients except for olive oil in a blender or large food processor (or work in batches). Pulse until finely chopped. I like to be a little bit rough (as pictured), rather than totally smooth, but it’s up to you.

In a large pot, heat olive oil over medium-high until shimmering. Add mixture and cook, stirring occasionally, until thickened and reduced, 25 to 30 minutes (reduce heat if browning at edge). Add salt to taste.

If saving any portion for later, remove from pan, let cool completely, then transfer to an airtight container. Refrigerate up to 2 weeks, or freeze up to 6 months.


To turn your sofrito into meal: After the sauce has cooked down, add in any protein you like, such as chunks of boneless chicken or seafood, and cook until done. Our favorites are chicken thigh meat, mussels, shrimp, or a combination of seafood (such as Trader Joe’s seafood trio).

Serve hot with pasta or rice.


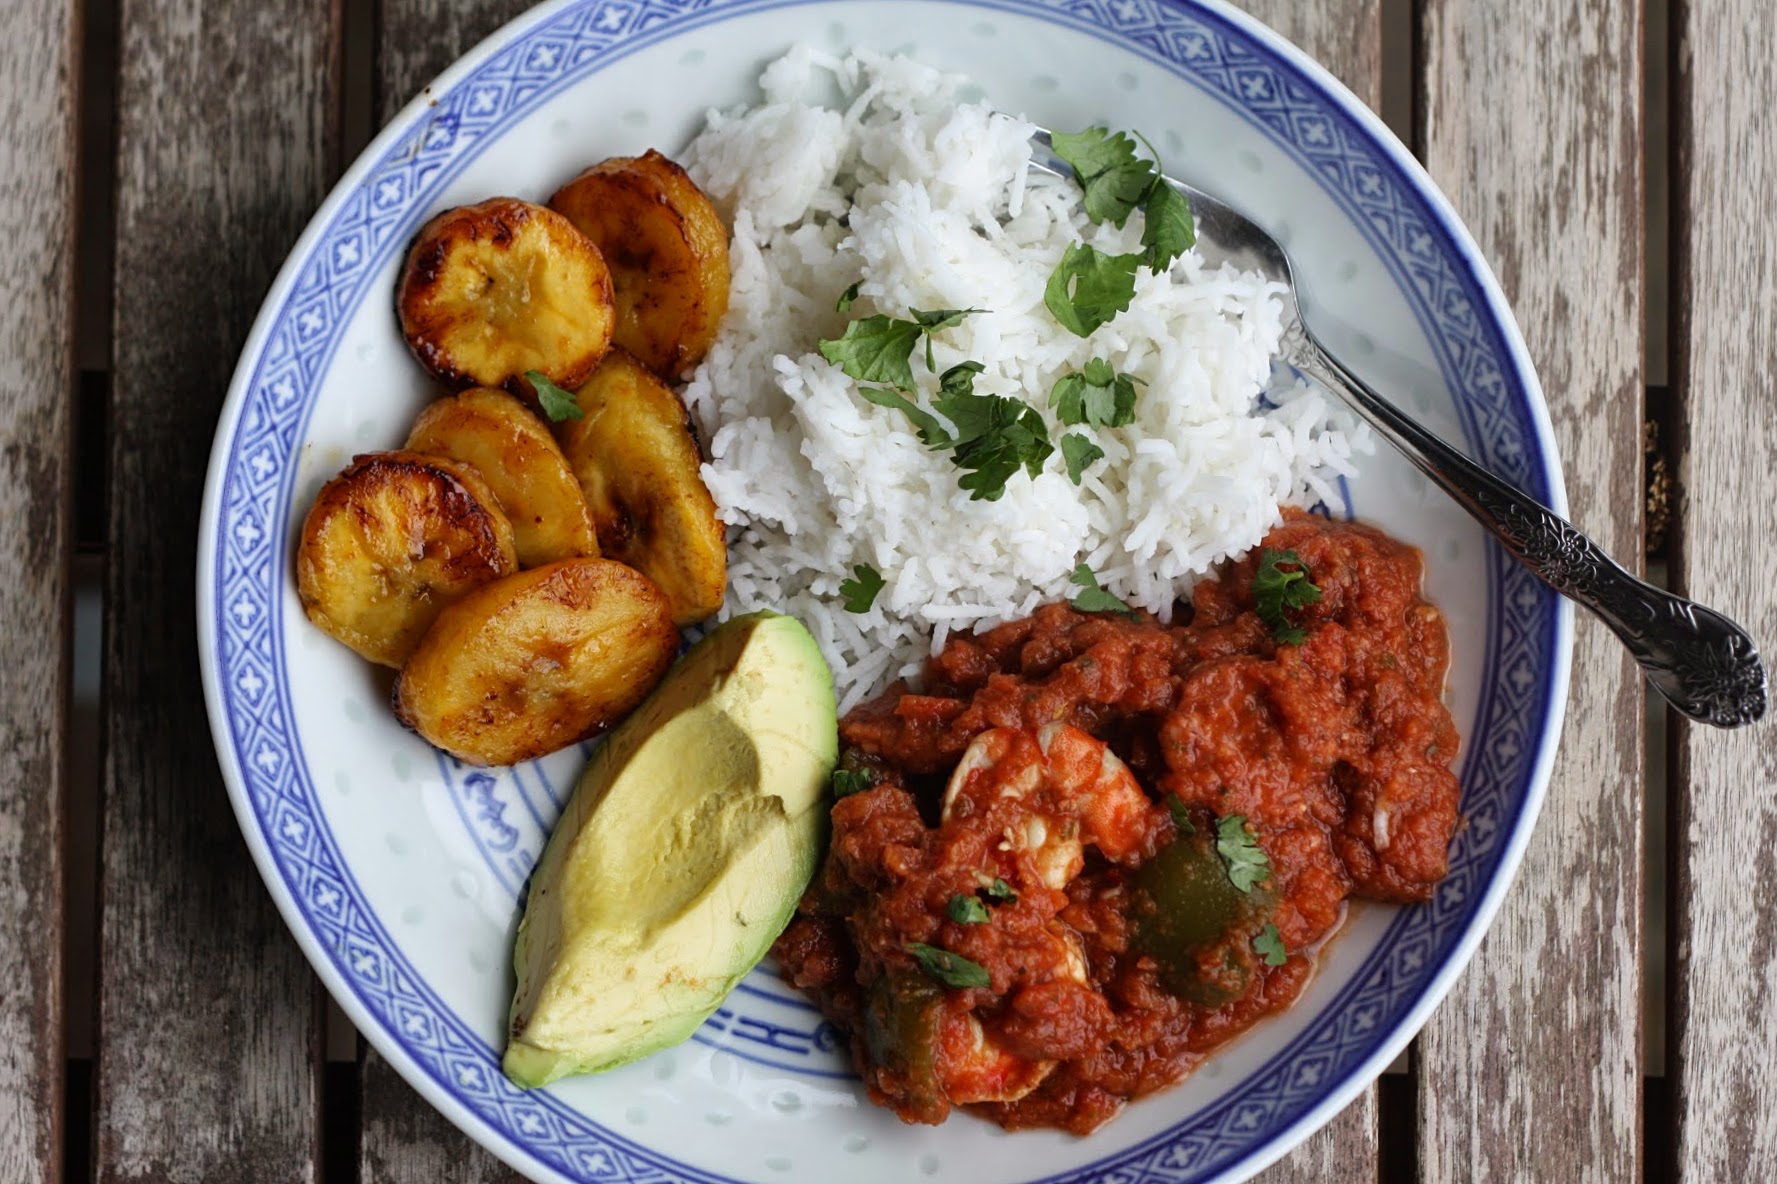
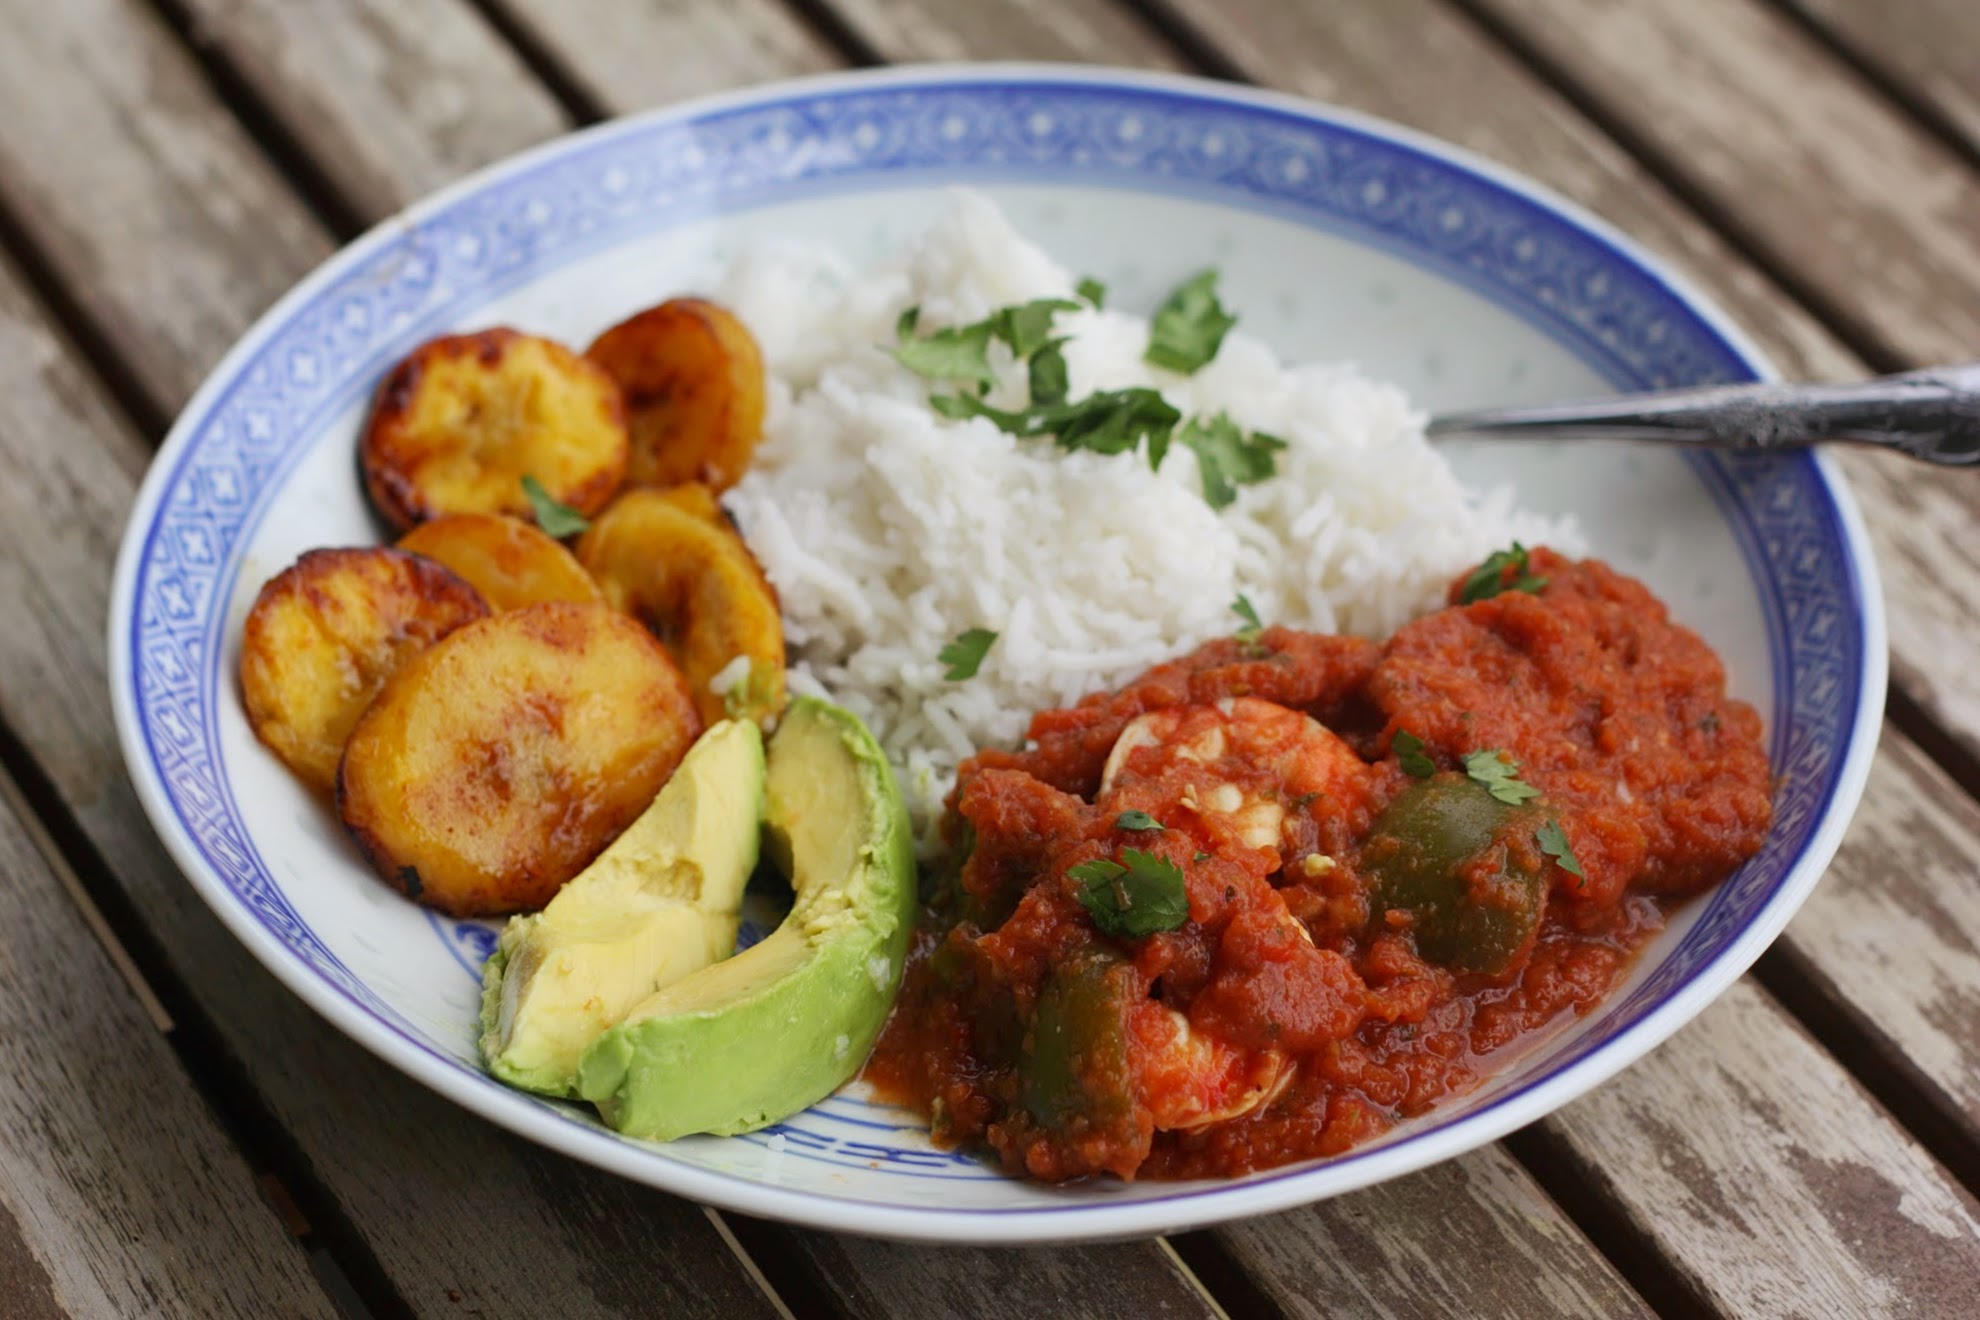
To make my all-time favorite sofrito meal (pictured): While the sofrito is cooking down, boil a pot of water for rice. Rinse 1 cup (or more) of basmati rice, then add to boiling water. Cook, at a boil, for 10 minutes, then drain and set aside. Keep warm in a covered bowl.

Peel 2 large, very ripe plantains and cut into slices. Salt the slices well and then fry in a little coconut oil until browned on both sides. This should only take a few minutes. (Fried plantains are SO easy, and SO delicious.) Set aside and/or cover with foil to keep warm.

Add peeled, uncooked shrimp to the simmering sofrito (we do about 20 to 25 shrimp) and one green pepper (cut into chunks) and cook for about 5 minutes, or until the shrimp is opaque and green pepper is somewhat tender.

Top sofrito with additional cilantro if you have it, and serve alongside basmati rice, fried plantains, and avocado (I like a little Greek yogurt on top of the plantains too).

Sofrito Meal 2

Advertisement

Foraging Nettles

Nettle Plant 1

My mom comes to visit at least once a year. She stays a few days, and, unasked, does all my laundry, mending, cleaning, and so on. She claims she “enjoys” doing these things and of course I do nothing to dispute that.

We do try to add in a few activities and outings other than chores when she comes to stay, of course, and those usually include checking out new places/museums/shows, eating semi-fancy meals out, and cooking Indian food at home for her (she is a big fan).

A few years back, she came to visit around Mother’s Day and I felt like I really had to up the ante. Knowing she loves the outdoors as much as I do, I signed us up for a “Wild Coastal Edibles” walk, which I found while browsing my local conservation area’s website (not being a native New Englander, I’m always looking for new parks and areas to explore). The walk was led by author, environmentalist, and wild foods enthusiast Russ Cohen, and for four hours on a Sunday morning, he took us around Marblehead, Massachusetts and taught us all about the wild plants and weeds right under our noses that we could safely pick and eat without harming ourselves or the overall vegetation. We picked garlic mustard, chickweed, dandelion, sassafras (smells like root beer!), nettle, elderflower, kelp and kombu (seaweed), beach peas, and so much more. After the walk, he treated us to a spread of foods he had already prepared using some of these foods. The knotweed crumble bars still haunt my dreams—they were so fantastic. Needless to say, Mom and I loved the walk so much that we still talk about it. If you ever find one of these walks in your area, it’s definitely worth checking out!

After the walk, I bought a couple of books on wild edibles and an app (“Wild Edibles Forage” by “Wildman” Steve Brill) for my phone, but most of what I know I learned on that walk. Foraging is just so fun. It gives you a chance to learn about what’s around you and really interact with your environment and the bounty it can provide. You also sometimes happen to run into cool people doing the same thing as you—old Greek and Italian men in particular (usually hunting mushrooms or wild greens). Foraging is an age-old tradition and I’m all about bringing it back into style.

Since moving to New Hampshire last year, I’ve found a few different edibles around where I live. Most I find just by walking or cycling by and seeing them. I then take a photo and/or inspect the plant for positive identification (usually using my app) and make sure it’s in a place where it’s okay to pick. Many plants, even in parks, are fine to pick responsibly, so long as you are only helping the situation—for invasive plants, this usually means pulling out the whole plant, so it doesn’t keep spreading; for non-invasive plants, this usually means picking only part of the plant, so it can easily keep producing/reproducing. Check with your local park for their rules and regulations. It goes without saying that any edibles on someone’s property should only be picked with permission (though I usually find this is readily given… especially in the case of dandelion greens and other weeds). And be sure no spray has been applied to the plants.

Trio of Greens

From left: garlic mustard, dandelion, stinging nettle (note gloved hand!).

In summer, my favorite thing to pick is berries—blackberries are especially plentiful in the New England area, as our elderberries, which I hope to post about in a few months’ time, when they’re ripe for picking. In spring, stinging nettles are my top pick (literally). It took me a long time to finally find them, but when you do, you know—usually by getting stung by their tiny hairs (the pain is temporary and nothing major). They grow near a stream on a dead-end road I walk in my neighborhood. I feel comfortable picking them from there because it’s rural road with hardly any traffic and the land is conservation area.

Nettles, once cooked, taste like an earthy spinach, and go exceptionally well with pasta, eggs, or anything creamy. They are one of the most healthful foods on Earth, with more protein than any other green. They’re also very high in iron, calcium, magnesium, potassium, manganese, carotenoids, vitamins C, K, and B-complex, and more. Nettles have long been thought to help treat the chronically ill, especially those with iron deficiency, and have also been used as a diuretic aid and an anti-inflammatory. This link provides more info should you be interested.

Nettle Plant 2

Ready to be picked! I’ll snip the top 5 to 6 inches (or 2 to 3 sets of leaves) of these plants.

I know ramps are the current darling of foraging and farmer’s markets, but I would not be surprised if nettle took over the spotlight very soon. If you’re interested in picking your own, here’s what you need to know.

Where they grow: Partially shaded, moist, rich soil. Disturbed habitats, fields, open woodlands, edges of trails, thickets, and riverbanks. Nettles can be found in most of the continental U.S., Canada, and Mexico, as well as most of the temperate world.

Road

My foraging spot (the little nook to the right is where the nettles live).

When to collect: Early spring, before they flower and become inedible (which is close to late spring/early summer). You can also try collecting them in autumn, when new growth appears.

How to identify: Stinging nettles sting. This causes minor skin irritation (like a bee sting) but disappears within an hour. I was actually pretty excited to get stung the first time because it meant positive identification, but one sting was enough. You should always wear gloves and long sleeves when collecting them.

The stem of a stinging nettle plant has tiny, almost indistinguishable hairs (these are what sting) and is ribbed, four-sided, and hollow on the inside. They grow from 3 to 7 feet tall, though you want to collect them when they’re young, around 2 to 3 feet (as pictured). The leaves are heart-shaped with a toothed edge and pointed tip, and appear in pairs (meaning one right across from the other on the stem); I find the leaves are one of the best ways to find and identify them. When the plant flowers, the flowers are small and green. At flowering stage, they’re past their potential for picking, but you can at least mark the location for next year.

How to collect: Wear long sleeves, pants, and gloves. Using scissors, snip off the top third of the plant, or the first 5 to 6 inches, right above a leaf nodule/pair if you can so it’ll grow right back (and you can collect again). This the most tender part of the plant.

Bag of Nettles

Ten minutes of work yields a full bag!

How to prepare: Rinse thoroughly in several changes of water to remove any dirt and bugs. I like add a little white vinegar to the water too, just to make sure I’ve gotten everything off. I use tongs for swirling/washing so I don’t touch the hairs.

Bring a large pot of water to a boil and add a tablespoon or two of kosher salt. Boil the nettle for about 5 minutes—this will completely deactivate the stinging hairs and make them perfectly safe to eat. You can also steam the nettles for the same amount of time instead of boiling; some say this helps them retain their flavor better than boiling.

Chop up the wilted greens and sauté with garlic and olive oil (and other greens if you like—I like broccoli rabe, but you may want to use something sweeter, like baby spinach, to offset the more forward flavor of the nettle) and add to pasta. Or make pesto. Or add to soups. Or eggs. Basically any place you add or like greens, nettles can go! The leftover cooking water (broth) is also deeply nutritious and can be used in soups. You can freeze the wilted nettle for future use as well.

Wilted Nettle

Wilted (cooked) nettle.

With this year’s first batch, I made this Greek wild greens and feta pie (pictured below), using a combination of nettle, dandelion greens, and garlic mustard (pictured above) in place of the chard. It was wonderful. We packed a few slices for a beach picnic, ate some for breakfast, and the rest I shared at work—they were gone in seconds. Last year, I made a big batch of this nettle pesto and froze it for quick weeknight pasta meals.

I know that foraging can seem a little intimidating, but I find the best strategy is to pick one or two plants to look for, and focus on those (get the kids involved too!). And if you happen to get “muggled” as my friend puts it (i.e., funny looks from someone who has no clue what you’re doing), use it as an opportunity to help spread the word! People are genuinely interested, and often end up sharing a great story about how their grandparents used to do the same, or where they’ve seen an untouched patch of berries or an apple tree. Embrace the plants, and the people too!

Wild Greens Pie

Greek wild greens and feta pie (hortopita).

Healthy Snacks

Snacks 1

The perks of being a cookbook editor are probably pretty obvious—you get to read hundreds upon hundreds of great recipes day after day. Yes, it is fun—and yes, it is exhausting. I liken it to going to the grocery store and buying one of every single thing in the store. You can make so…many…things…! The possibilities are endless! But where do you even begin? What do you do?

Simple. You faint like an over-excited goat.

(Sorry, too great not to share.)

Really though, this is what actually happens: You bookmark all your favorite recipes while you’re editing, tell everyone at lunch about your grand cooking plans—then forget about it all completely by the time you’ve reached home at 7:30 pm. You eat Chipotle for dinner.

BUT WAIT!, months later, the printed book arrives and it’s like Christmas! You get excited all over again, go nuts with your arrow flags, and bring an advanced copy home to (finally) commit to the task.

You make many, many snacks (or smoothies, or one-pot dinners, or whatever the subject may be) and declare how much you love your job, and your authors. You text your coworker friends, email your author your thanks, and decide to write a post on your blog about it all, which, ironically, is probably how you came across the book idea/author in the first place (yep, a blog).

That was a fun ride, wasn’t it? #booklyfe

So back to the snacks. They come from a new book called The Best Homemade Kids’ Snacks on the Planet (yes I realize the title is wicked long—it is part of a series). The author, Laura Fuentes, and I are now working on our third book project together, which pretty much puts us in best-bud territory. Laura’s recipes are awesome, and the photos she and Alison Bickel churn out are amazing. Do I sound like a proud parent? Well, I am. Sometimes you have to gloat.

After finally getting my hands on a copy yesterday (there are quite a few of us fighting over them), I picked two recipes to make for myself. This was not an easy decision as 1) I LOVE snacks, a fact you may remember from this post, and 2) I was starving so all of the recipes seemed to be calling my name. I finally settled on one one super-simple, no-bake recipe (cookie dough balls) and one healthy baked treat (a granola-type bar). I loved them both so much that I asked Laura if I could share each of them here, and she of course agreed (best buds!).

Whether you’re making them for yourself or your kids, these are quick and easy recipes. They’re also filled with natural ingredients, and are about a zillion times better than the store-bought stuff, from both a taste and a nutritional standpoint. I’ll be making them weekly—until I’m swayed by the rest of my tabbed recipe pages, of course.

No-Bake Cookie Dough Balls
These are actually called “Winnie the Pooh Snacks” in the book, but I felt slightly creepy using that title as I was just making them for myself and thought Suraj might be a bit weirded out seeing a container with that label in the fridge. They’re so good though! Like a mix between a buckeye (minus the chocolate) and peanut butter cookie dough—but with all-natural ingredients. If you’re unsure on the coconut, I’d encourage you to try them anyway, as I didn’t find that flavor noticeable at all. Next time I’m adding a few mini chocolate chips too. // Yield: 8 to 10 balls

1/2 cup (112 g) creamy almond butter (I used ¼ cup almond butter + ¼ cup natural peanut butter—definitely recommend)
1/4 cup (85 g) honey
1/2 teaspoon vanilla extract
1/3 cup (27 g) unsweetened, dried coconut
1/3 cup (42 g) coconut flour* (see Note below)
1/2 teaspoon cinnamon

In a medium bowl, combine all ingredients, mixing until they form a ball of dough. If your dough is dry, add a little more nut butter or honey. If it’s too wet, add a little more coconut flour. (Mine was just fine.)

Scoop out tablespoon-size portions and roll into balls.

Place on a plate and serve immediately or refrigerate in an airtight container for up to three days.

Note: Coconut flour is available in grocery stores now, and is a great product to keep on hand. It contains no gluten and no grain, and is low in digestive carbs and high in fiber and protein. It contains only one, all-natural ingredient—coconut—but is actually very subtle (and slightly sweet) in taste, so even if you don’t like coconut, you really can’t detect much of that flavor. And because it’s so high in fiber, you only need a small amount in any recipes calling for it, as it absorbs a good deal of liquid/moisture.


Energy Bars (aka Homemade KIND Bars)
These fruit and nut bars are the perfect cross between a granola bar and rice krispie treat, and remind me a lot of KIND bars (only with fewer ingredients). Light enough for a snack, but still satisfying. Brown rice syrup is available in most grocery stores, usually near the honey. You can swap out pretty much any of the nuts or fruit with what you have on hand, as I did below. Note that when you take them out of the oven, they may seem too soft, but they set up more once they’re full cooled. You can cut them into either squares or bars. // Yield: 8 bars or 16 squares

1 cup (110 g) almonds, coarsely chopped (I used blanched, sliced almonds)
1/2 cup (48 g) sunflower seeds, chopped (I used a mix of hemp seeds, sesame seeds, and crushed peanuts instead, as I didn’t have sunflower seeds)
1/3 cup (6 g) crisped brown rice cereal (I used plain puffed white)
1/4 cup (35 g) raisins
1/4 cup (35 g) dried blueberries (I just used ½ cup chopped dried cherries for the raisins/blueberries)
1/8 teaspoon sea salt
1/4 teaspoon cinnamon
1/3 cup (115 g) brown rice syrup

Preheat the oven to 325°F (170°C). Line a square baking pan with parchment paper. (I greased it with a little coconut oil first so the paper would stick.)

In a large mixing bowl, combine almonds, sunflower seeds, brown rice cereal, raisins, blueberries, sea salt, and cinnamon. Pour brown rice syrup over nuts and fruits, using a spatula to evenly distribute the syrup throughout.

Pour mixture into baking pan. Place a second piece of parchment or waxed paper on top of mixture and press down to compact ingredients (I just used wet hands). Remove the top layer of paper.

Bake for 20 to 22 minutes, or until the bars begin to brown around the edges. Remove from oven and cool to room temperature.

Using excess parchment paper as handles, lift the bars out of the pan and place on a cutting board, paper side up. Peel off paper and cut into bars or squares. Store extras in the fridge. I like to wrap them individually in waxed paper so I can pack them in my lunch bag.

Snacks 4

Bone Broth: A How-To

Stock Pot

Homemade chicken broth, or bone broth of any kind, is a highly nutritious food and one that’s been in the press quite a bit lately (New York Times, Forbes, etc.). Essentially, it is the liquid that results from cooking down bones/meat + vegetables + water for anywhere from 6 to 24 hours (if you add salt and seasoning to it, it’s called broth; if you don’t, it’s called stock).

Bone broth dates back to prehistoric times, but has recently been rediscovered for its health benefits. While there are a lot of magical claims swirling around on the subject, here are the top three reasons I love it and consider it an important food:

  • Homemade broth is full of nutrients, including calcium and magnesium, two important minerals that we can absorb easily through drinking/eating it. Bone broth also contains glucosamine and chondroiton, which are thought to help ease arthritis and joint pain (many people take these in supplement form, but broth is an excellent all-natural source).
  • Bone broth is rich in gelatin. Gelatin is source of protein, helps support digestive health (many say it can help heal digestive disorders), and keeps our skin, hair, and fingernails healthy and strong. Everyone benefits from adding gelatin to their diet.
  • Bone broth proves our Moms are always right. Studies now show that chicken soup does indeed help cure colds and flu. Why did we ever doubt them? 

To summarize, bone broth is good for our guts, bones, joints, and skin (and soul if you’re still following Jack Canfield). It also happens to taste great and turns every soup we make into something remarkable… which is probably why I make a huge batch of the stuff every other week. The flavor of homemade broth is rich and decidely umami. Store-bought versions just don’t compare, from both a health and taste perspective. Just check out the ingredients next time you buy a can or carton; it’s full of flavorings and preservatives that try to mimic the flavor of the real stuff, but always fall short.

The good news is that you can make your own homemade broth for next to nothing, using ingredients you probably discard otherwise. Just how do you it? Here is my simple and easy method: I keep a gallon-size “broth bag” in my freezer at all times. Whenever we have bones left over from a meal, such as roasted chicken, they go in the bag. Whenever I have vegetable cores and scraps leftover from food prep, they go in the bag. When they bag is full—I try to fill it with roughly half bones and half veggies—I dump the contents into a big pot, cover it with water, add some peppercorns, and let it simmer all day or night. In the end, the bones are so broken down you can easily snap or crush them, all the veggies are spent, and the resulting liquid is full of both nutrients and flavor. I strain and discard all the solids, add salt, and refrigerate or freeze the broth, using it throughout the week to make soups and stews, braise other meats and vegetables, and cook rice in. It’s indispensable in our kitchen.

Any combination of meat/bones and veggies will work. In the broth pictured, for instance, the following is what I used. The first three items were leftover from cutting up a whole (organic) chicken, which is super easy and cost-effective once you get the hang of it. All of these items filled one gallon-size freezer bag:

  • two raw chicken wings, including tips
  • one raw chicken back (the part between the breasts)
  • one giblet pack that was inside the whole chicken (I took out the liver piece—it’s too strong for broth)
  • one pork bone shoulder (leftover from slow cooker pulled pork we had made)
  • roasted chicken thigh bones (meat had already been eaten off; we had baked the thighs)
  • kale stems
  • carrot peels
  • outer leaves of a cabbage
  • base of a bunch of celery, including leaves
  • base and tops of a few summer squash/zucchini
  • onion skins
  • ginger peels
  • turmeric peels

I realize that some people may wrinkle their noses at this list and the prospect of cooking down chicken bones and other otherwise-unsavory parts, but I actually find it to be quite a beautiful and respectful act. Using all these parts allows us to use the whole animal—not just the all-mighty “boneless, skinless chicken breast”—which is much more considerate and ethical to both the animal and our environment as a whole. It goes without saying that choosing and using organic meats (preferably pastured and local too) is also part of this. The good news here is that most of these items are quite cheap, and very often on sale. I never pay more than $10 to $12 for a whole, organic chicken; chicken thighs on the bone are usually under $5 for a pack of 5 to 6; and sometimes you can even find “chicken backs,” which are sold expressly for making broth, for just a few bucks.

I’ve provided a template recipe for making your own bone broth below, which I encourage you to use as a jumping off point. Try it once and I promise you’ll be a convert.

[Hover over the photos for captions.]


Bone Broth
You really can’t “mess up” broth—basically any bones or meat-on-the-bone you can save/use are great. The meat can be either cooked or uncooked; I usually use a combination. As for vegetable scraps, with the exception of potatoes and tomatoes, any sort are welcome. // All this said, if you really want to make things easy on yourself: buy an organic rotisserie chicken from the store, remove all the meat and use it in other meals, and cook whatever remains along with a bunch of carrots, celery, and an onion. You could also do this with a raw whole chicken too. // Yield: About 16 cups

Meat Parts (cooked or uncooked; with or without meat attached; organic highly preferred):
Leftover pieces of rotisserie or roasted chicken, including bones with or without meat on them (eaten or uneaten—you will be boiling it for hours so you really needn’t worry about contamination)
Chicken wings, including tips
Chicken backs and/or feet (I realize this sounds weird, but they make great broth!)
Beef, lamb, or pork bones

Vegetable Parts (basically anything you’d put in the compost bin; organic wherever possible):
Kale, chard, or any other hearty greens, stems especially
Cabbage, outer leaves and core especially
Celery, including bottom core and leaves
Carrots, including peels and tops
Cilantro or parsley stems
Onion and garlic skins (or just a whole onion, quartered)
Leeks, especially the (typically inedible) green tops
Lemon peels

Other Add-Ins (for Flavor):
Whole peppercorns
Bay Leaf
Any herbs you may have, such as rosemary or thyme
Kosher salt

Save up any of the above items in a gallon-size plastic bag, keeping it in the freezer.

Once the bag is full, pull out the largest stock pot you have, and dump it all in (no need to thaw). Cover with filtered water and add any of the “Other” items you like. I usually just do a handful of peppercorns, and add the salt at the end. You could also do this in a slow cooker instead, and just cook on low overnight or all day. Both methods are great; I’ve just been doing the stove-top version lately as the smell of the broth cooking literally wakes me up in the middle of night when it’s in the slow cooker, ha. (I have a ridiculously sensitive sense of smell.)

Bring to a boil then reduce to very low simmer and cook for at least 4 hours, ideally 6 to 10. Add water as needed if it looks like it’s cooking down too much. By the end of cooking, the liquid should be a rich golden color, with some oil drops on top (this is a great sign and = flavor).

Strain all the liquid (broth) and discard the solids. Add salt to taste—if you think your broth is too strong, add additional water until it’s as you like. I usually don’t though, even it’s really rich, because I like to freeze it in this “condensed” form, and then just add more water once I’m actually using it to make soup or other things. It takes up less space in my freezer this way.

Allow to cool and then transfer to large glass jars or other storage containers; refrigerate until needed. If your jars develop a layer of fat on top after chilling, that is great (see photo below). This actually helps seal in the broth and allows it to keep in the fridge for longer (just don’t break the seal). I just mix this layer back into the broth once I’m ready to use.

If freezing, carefully pour the strained liquid into gallon size freezer bags. Lay flat on a baking tray and freeze until “sheets” are solid (see photo below), then just stack them in your freezer. Run under warm water to defrost.

Use your broth any and everywhere! (Or be super trendy and drink it plain.)

Final Broth

Ribollita Soup

Ribollita Lunch

We are a soup-loving household. I grew up on homemade chicken noodle soup; Suraj on dal and sambar. The roots run deep.

Soup ticks all our boxes. Can it be made in advance?—check. Is it a one pot meal?—check. Does it contain vegetables?—check. Does it contain protein?—check. Can it be eaten with bread?—check check check (okay, this last one may just be me…).

Ribollita is one of our very favorite soups and on an almost weekly rotation here. It’s Italian—Tuscan, to be precise—and features veggies, beans, and bread, which in my mind, is the ultimate trifecta. We add sausage as well (mostly to satisfy Suraj’s usual “Where’s the meat?” question), but seeing as it’s a soup with peasant origins, this can easily be skipped should you so choose. I’ve made both versions, and neither lasted long.

Finally, it’s worth mentioning that the leftovers here are actually better than the first serving, which makes the next day’s lunch something to really look forward to. I have one last bowl left for tomorrow, expertly hidden in the back corner of the fridge. Territorial? Maybe. Smart? Hell yes.

Ribollita Bowl

Pre-crouton dousing.


Ribollita
Quite a few ingredients here can be substituted as you like. You can use either hot, mild, or sweet Italian sausage, or skip entirely if you’re vegetarian, and just start with sauteing the vegetables in a little olive oil, and then using vegetable stock later. You could use celery instead of kale stalks (as is traditional—I just didn’t have any and didn’t want to waste the stalks). And/or you can skip the white wine and use more broth instead (though most of it cooks off anyway—and it imparts a perfect tang, in my opinion). You can also add in any other veggies you like, such as diced zucchini or cubed potato (which is especially good if you’re doing a vegetarian version). Play around! It’s only soup! // Adapted from Bon Appetit. // Serves 6 to 8.

2 cups coarsely torn day-old hearty bread, such as sourdough*
2 tablespoons olive oil, plus more
1 pound Italian sausage (we like hot), casings removed
1 cup dry white wine (I used Pinot Grigio)
1 medium onion, finely chopped
3 medium carrots, finely chopped
5 to 6 kale stems, finely chopped
3 garlic cloves, minced
1 teaspoon crushed red pepper flakes
1 bunch Tuscan kale, stems/ribs removed, leaves torn into small pieces
1 can diced tomatoes
2 cups cooked white beans (I used some from my freezer, which I had previously soaked and cooked; you can use canned if that’s what you have)
8 cups chicken broth (I used homemade)
Kosher salt and pepper, to taste
Parmesan, shaved or grated, for serving

Preheat oven to 350°F. Toss bread cubes and olive oil on a rimmed baking sheet. Toast, tossing occasionally, until golden brown and crunchy, about 15 minutes. Let croutons cool.

Using your hands, mix sausage and wine in a medium bowl until smooth. Transfer to a large soup pot set over medium heat and cook, stirring occasionally, until firm but not browned, about 4 minutes.

Add onion, carrots, kale stems, and red pepper flakes. Cook, stirring occasionally, until vegetables are tender but still hold their shape, 20 to 25 minutes. Add kale leaves, tomatoes, beans, and broth and bring to a boil. Reduce heat and simmer, stirring occasionally, until flavors have melded, about 1 hour. Add kosher salt and pepper to taste.

Divide soup among bowls and top with croutons and a grating of Parmesan.

*Ribollita is the landing place of all the little knobs and crusts of sourdough that don’t make the toast cut but that I can’t bear to throw away either.  I save them up in my freezer, and when my bag is full, the soup pot immediately gets turned on. That said, any type of hearty bread will work just fine. We recently used some garlic Tuscan from Wegman’s (!) and it was perfection.


Homemade Breakfast Cereal

Cereal Bowl Final

I went home to upstate New York last week for Easter. It’s about an eight-hour drive from New Hampshire if I only stop once for gas, and every hour that passes feels like five. Flying there is much faster, of course, but this time around I had five GALLONS of olive oil in my trunk to deliver to family members (we did a bulk buy, as I mentioned here). I kept imagining the scenario in which I would be pulled over and would have to explain what, exactly, I was doing with a car full of olive oil, but gladly that never happened.

Going home was nice. My mom and most of my siblings still live in the area, so it’s always busy/lively when I go back. I’m still getting used to the idea of my Dad not being there though. It’s been six months since he (unexpectedly) passed away, and I still have a hard time believing he’s not just going to walk back in the door or come sit down at the table with us. I want to talk about him, but most times I can’t do so without a huge lump jumping into my throat and my eyes welling up. In time.

…so back to Easter. There was a lot of food—as always. With nearly everyone in my family being food-obsessed (my brother is a chef and the rest of us are just avid cooks/bakers), there’s always a full spread. Ham, Polish sausage, scalloped potatoes, green beans, Brussels sprouts, asparagus, you name it. I decided to add a panzanella bread salad to the mix (loosely based off this recipe, with a lot of garlic and feta added in), using a loaf of homemade sourdough I had brought with me. It was excellent and we ate the leftovers for days. I made a cake for dessert too, following Dorie Greenspan’s celebration cake recipe (a favorite), and filling it with fresh orange curd made from my sister’s abundant CSA citrus share. It was all so good.

Aside from the things we made while I was there, I brought along several jars of my homemade cereal. I’ve been making it for years now, and everyone likes it so much that I literally give it to my mom as a Christmas present.

Why do I make my own cereal? Well, you can probably guess—most cereals on the store shelf, even the “healthy ones,” are filled with unpronounceable things you probably want to avoid. Here’s what my homemade version contains: spelt flour, almond meal, kefir, coconut oil, maple syrup, salt, cinnamon, baking soda, vanilla and maple extracts. All healthy, recognizable ingredients, right? Plus, it’s easy to make and yields a huge batch. Stored in the freezer, it lasts months.

As for the taste, think nutty granola meets muesli (or Great Grains meets Oatmeal Crisp if you want a brand-name comparison). Crunchy and slightly sweet upon first bite, then softening like porridge or oats as it absorbs the milk (I like it best this way). It’s the only breakfast cereal I’ll ever need. And, coincidentally, my best Christmas gift.

[Hover over photos for captions.]


Homemade Breakfast Cereal
Start this recipe the night before you want to make it; I usually start it on a Friday night and finish it on Saturday. The process is this: Soak your ingredients the night before (I talk about the importance of soaking grains/flours in this post), bake it into a cake the next day, then crumble and dry the cake pieces out. Voilà, cereal! It’s really a simple and fun process. Recipe adapted from here. | Yield: About 14 cups.

To soak the night or day before:
4 1/2 cups spelt flour (or regular whole wheat)
1 1/2 cups finely ground almonds/almond meal/almond flour
3 cups plain kefir, buttermilk, or yogurt (thinned with water)

To mix in after soaking:
3/4 cup melted coconut oil
1 cup maple syrup or honey (or 1/2 cup each, or 1/2 cup maple syrup and 10-15 drops liquid stevia)
1 teaspoon sea salt
2 teaspoons baking soda
1 tablespoon ground cinnamon
1 teaspoon vanilla extract
1 teaspoon maple flavoring, optional

To serve:
Dried fruit and chopped nuts (I like chopped dried plums, dried cherries, walnuts, and toasted hazelnuts; pictured is just sliced almonds as it was for my mom)

The night or day before you want to bake the cereal: Mix flour, ground almonds, and soaking medium of choice in a large glass bowl. Mix just until no dry flour remains, but don’t overdo it—you want to keep it loose so it’s easy to combine with the other ingredients the next day. Cover with a loose lid and leave on the counter for 12 to 24 hours. (Mine bubbles up quite a bit and grows in size because my kefir is so active; see first photo in series above.)

The next day: Once soaking is complete, preheat oven to 350º F (175º C). Lightly grease two 9×13-inch pans or one large 11×17-inch pan, which is what I used.

In a mixer, combine the second group of ingredients, then add the soaked flour mixture a cup or so at a time, beating until fully blended. I work slowly here, so it all incorporates well.

Pour batter into pans and bake for about 30 minutes, until a toothpick inserted in the center comes out clean and the cake is lightly golden in color.

Let cool then crumble the cake into small pieces, about the size of marbles or a little larger. Spread on cookie sheets if drying in the oven, or dehydrator sheets if using a dehydrator (I’ve used both with success). In oven, dry at 200º F (95º C) for at least 4 to 5 hours, rotating sheets and turning cereal every hour or so. The cereal is done when the pieces feel completely dry (like granola), with no moisture remaining. In dehydrator, dry at around 135º F (60º C) overnight.

Once cool, add in any dried fruit or chopped nuts you like. Store in the freezer if not using immediately.

Eat with either warm or cold milk (dairy, almond, or otherwise), with blueberries or sliced bananas if you have them. [Note that I usually have about 1/2 cup or less of the cereal itself, as it’s super filling!]


Cereal with milk

Cucumber Roti (Flatbread)

Cucumber Roti

Breakfast is easily my favorite meal of the day. (You’ll be seeing a lot of it on this blog, I assure you.)

It’s also one my favorite parts of the weekend. I love the gentle pace that comes along with it, the rituals behind it (for us: tea, then more tea), and the stretch of the day ahead. It’s comforting. It’s warm. It’s that place where you want to sit and stay awhile.

Aside from eggs in all forms (omelet for Suraj, scrambled for me), we gravitate toward Indian breakfast items. Dosa/iddly, poha, and savory pancakes like moong dal cheela and cucumber roti (recipe below) are our top picks. I think if I ever actually wrote a cookbook myself (aside from just hiring people to do it), it would be on Indian breakfasts. There is just SO much to love when it comes to this cuisine, this meal. Wholesome ingredients, a light touch of spice, veg-centric, filling-but-not-coma-inducing (and often fermented, like dosa)—addicting, in a word. My “to blog” list includes dozens of these recipes, and I hope to one day share them all here (check out my Instagram in the meantime for photos of most of them, and proof that I am in fact obsessed).

Our weekend breakfasts all take more time to prepare than pouring a bowl of cereal, but that’s what I like about them. I like listening to Sunday Morning while pulling things together, and having Suraj come join me to finish the tea while I take things off the stove, or cut up some fruit. When we sit down together, we’re both relaxed, but hungry, and can look forward to a warm meal in front of us, and the day ahead.

In the case of this cucumber roti, or flatbread, it’s one I posted about to friends on Facebook a few weeks ago, when I was once again waxing poetic about this very subject (I’m fast becoming a broken record, aren’t I?). A few people asked for the recipe, which I’m more than happy to share here. It’s rather easy to prepare, gluten-free by nature, and full of flavors that work beautifully together (cucumber, coconut, rice, cilantro). The cucumber and coconut help keep the interior soft and subtly sweet, while the outside crisps up in beautiful contrast—it’s a savory pancake/flatbread like no other. I hope it finds its way into one of your weekend mornings.

Cucumber Roti 2


Cucumber Roti (Flatbread)
This savory flatbread is made simply from grated cucumber mixed with rice flour, coconut, and a few spices/herbs (cumin, cilantro, chili). There is no water or other liquid added; the cucumber itself hydrates the dough. It is light on the stomach, yet filling at the same time. You can find grated, frozen coconut at any Indian grocery store. It’s pretty cheap, requires no prep, and tastes amazing; I just defrost it in the microwave for about 45 seconds. If you can’t find it, you can use unsweetened, dried, shredded coconut—just soak it in 1/2 cup of hot water for 20 minutes or so, then add it to the dough along with the soaking water (I haven’t tried this personally, so you may need to play with the water ratio).

2 cups rice flour (I use white rice flour, as it’s easier to digest than brown)
1 english cucumber, peeled and grated
1 carrot, peeled and grated
1 teaspoon cumin powder
1 teaspoon cumin seeds
1/4 teaspoon turmeric powder (optional)
1 teaspoon salt
1 cup fresh coconut
1 to 1 1/2 teaspoons salt (the salt helps draw out the moisture)
4 green chillies, finely chopped (optional)
1/2 cup chopped fresh cilantro
Coconut oil, ghee, or other cooking oil
Butter, for serving

Combine all the ingredients (except for the oil and butter) in large bowl. Don’t add any water, just start kneading it all together with your hands. As you work, the moisture from the cucumber will start releasing and hydrate the flour. After a few minutes, it should start coming together into a ball and feel like play dough. If it still feels too crumbly, add a couple of drops of water and keep kneading (I’ve never had to do this, but if you had a small cucumber, maybe you’ll need to).

Divide the dough into equal portions, making each one about the size of an orange. Working with one piece at a time, place on top of a sheet of waxed paper and press down with your fingers to flatten to about 1/4 inch thickness. You may need to wet your hands with a little water if they’re sticking. Conversely, you can lay a second piece of waxed paper on top of the dough (flattening slightly) and gently roll it out with a rolling pin (or use a tortilla press).

Heat a cast iron pan or skillet with a few teaspoons of coconut oil or ghee over medium heat. It’s hot enough when a drop of water sizzles. Gently transfer the roti to the skillet; I do this by taking off the top sheet of waxed paper (if using), then picking up the whole thing by the bottom piece of waxed paper and flipping it over onto the skillet, so the waxed paper sheet is now on top—I then quickly and gently peel off the top paper.

Cook for 4 to 5 minutes on each side, until lightly browned in spots. Remove and serve hot with butter and a sprinkle of salt. We like to have ours with hard-boiled eggs, avocado, Greek yogurt, Indian pickle, and chutney.

If you have any leftovers, just keep them in the fridge and reheat in the toaster. They make a great weekday breakfast this way!

Kefir & The Importance of Fermented Foods

Kefir Orange Smoothie

Several years ago, when I first started researching/learning about fermented and cultured foods, I came across a few articles about kefir, an ancient probiotic dairy drink similar to yogurt but, reportedly, even better for you.

Curiosity piqued, I picked up a bottle from the store and used it to make a smoothie. The flavor was great—tangy and slightly effervescent. Moreover, I liked how it made my stomach feel: settled and refreshed. While I had never thought of myself as someone with digestive issues or sensitivities, I did regularly feel like I had too much “air” in my stomach after eating (I really can’t think of a better way to describe it—just kind of like there were air bubbles between my rib cage or something). It was a little uncomfortable, but I honestly didn’t think it was related to what I was—or, in this case, wasn’t—eating.

But the more I drank kefir, the less the cramps seemed to happen. As I started having it daily, and making it myself rather than getting it from the store, I noticed that everything became more regulated with my digestion—no cramps/constipation/gas /bloating/nothing. I felt completely cleansed. Was this really the work of fermented food?

I am inclined to think so. Kefir was the only change I made to my already healthy diet at that point in time, and the bloating symptoms that I thought were just part of everyday life disappeared completely. Many others that I have passed on my kefir starter to have reported similar benefits.

So what are fermented foods, and how do they perform magic like this? Simply put, fermented foods are living foods rich in the microbes that our bodies need to function and thrive. Just like there is bad bacteria, there is good bacteria, and this is what fermented foods contain. These “good guys” go after the bad bacteria (and other nasty stuff), help balance out your digestive system, keep your immunity up, stave off disease, and much more. Research is only just beginning to discover all of the intricate and powerful work that microbes do.

To our misfortune, however, the amount of good bacteria (probiotics) we consume has declined sharply over the last few decades. Why? Because we over-sanitize. We ultra-pasteurize. We eat processed, dead food instead of the real, living stuff like plants. And we have let go of the age-old practices of fermentation that were once seen as vital to diet and life. Sauerkraut and pickles, for example, which were traditionally made using salt + time (the two keys to fermenting vegetables) are now made with vinegar, a shortcut technique that mimics the same “tangy” taste, but takes away all the benefits of real fermentation.

Bacteria has somehow become a bad word in our society, when in reality, it’s a vital life force.

One of the ways we can get ourselves back into balance is by adding fermented foods to our everyday diet. These foods are nothing to be scared of. Fermentation is just a process that transforms one food into an even more nourishing one. Think of cabbage → sauerkraut, cucumbers → pickles, grapes → wine, or milk → yogurt/cheese/kefir. This process, called lacto-fermentation, enables natural (healthy) bacteria to feed on the sugar and starch in the food, which in turn creates more enzymes and vitamins, breaks down difficult-to-digest food components, and makes minerals in the food more available for your body to assimilate. It also preserves the food so it can be kept longer. Magic, I tell ya!

My favorite fermented foods are sauerkraut/fermented vegetables, yogurt, kvass, kombucha, sourdough, and of course, kefir. I make most of these foods at home because I find it both simple and gratifying. It’s also much less expensive than buying them at the store, but that’s certainly fine too if you would rather! Just be sure to inspect your labels carefully. You want to see some mention of the product being “probiotic,” “naturally fermented,” “cultured,” and/or with “live and active cultures.” Going back to the pickles I mentioned earlier—most are indeed made using a shortcut version (i.e., vinegar), but you can find the real, fermented thing if you look around. A true fermented pickle will only contain cucumbers, salt, water, and maybe some spices. Here is a good example: Bubbie’s Kosher Dills. Just scroll to the bottom of the linked page and check out the label. See the simple ingredients, and the mention of “live cultures”? That’s a winner. Pickles like this can increasingly be found at health food stores, and farmers’ markets too.

As for kefir, you can either buy it from the store—in which case I would encourage you to just get the whole milk, plain variety, not the flavored stuff—or you can buy some kefir grains online and start making it yourself. The kefir grains, which look a little bit like cottage cheese, are just the “live and active cultures” you need to ferment the milk—the term “grain” just refers to their appearance; they are in no way related to wheat grains.

The process for making kefir itself is dead easy: You put your grains in a jar, add milk, cover, and let sit on your counter for about 24 hours, until you see the milk start to separate a bit and thicken. Then you just strain out the grains and your milk is now → kefir!

Homemade kefir is typically more potent than store-bought, and of course fresher. Better still, the grains can be used over and over again, and stored in the fridge in some milk when not needed. You can drink the kefir itself plain/as is, put it in smoothies (my favorite use), strain it to make “kefir cheese,” or even use a few tablespoons to soak your oats, grains, or nuts (as I covered in this post; you just sub kefir for the apple cider vinegar, as it does the same thing).

Whether it’s kefir, or sourdough, or something else, I encourage you to experiment with whatever fermented foods you think you’ll like best, and branch out as your taste for them grows, which it surely will (I still can’t believe how much I’ve grown to love sauerkraut). Start trying these foods in small doses, as they can be quite powerful—especially for those with any imbalance—and increase as you feel ready. Over time, your stomach and digestion should start acclimate and improve for the better …because, of course, you’ll be letting the good guys win!

Homemade Kefir

What you’ll need:
Kefir grains
Milk, preferably organic and whole (avoid “ultra-pasteurized,” which will not work)
Glass jar, plus a small cloth and rubber band to cover
Strainer
Bowl

  1. Kefir grains are live, active cultures that look like little pieces of cottage cheese or tiny cauliflower (see photo above). You can buy them online or get some from a friend if you’re lucky enough to know anyone who has some. You can also try to finding a Facebook fermentation group (I belong to one called “Boston Culture Sharing”) to see if people in your area are willing to giving away any for free. Craig’s list is a good resource, too; I’ve sold quite a few starters (sourdough, kombucha, kefir, etc.) there. If you just want to buy online, I suggest either Cultures for Health or the Kefir Lady, which is where I got my grains years ago.
  2. When you get the grains—you’ll probably have about teaspoon or so—place them in a strainer and rinse with filtered water.
  3. Put the rinsed grains in a glass jar and cover with about one cup of pasteurized milk—I use whole, organic, pasteurized milk. DO NOT use ultra-pasteurized milk. It is too “dead” for the grains to ferment.
  4. Cover the jar with a cloth and secure with a rubberband. Allow the jar to sit at room temperature for about 24 hours; you can stir it once or twice if you like but it’s not necessary. The milk will be undergoing fermentation during this time, a safe process that can only happen at room temperature, not in the fridge. Have a little faith in the safety of this—kefir dates back centuries! (Legend has it that Mohammed gave kefir grains to the Orthodox people and taught them how to make kefir. It is still widely consumed today throughout Eastern Europe and Asia.)
  5. You’ll know the kefir is done when the milk doesn’t swish around when you move the jar. It will seem thick toward the top, and you may also see small pockets of whey (clear yellow liquid) start to separate out—that’s a tell-tale sign it’s ready (see first photo in series above). If you see more whey than milk, you have let it ferment a little too long. It is totally safe to consume, but will just be a bit more tangy.
  6. Place a strainer over a large bowl and dump the contents into it. The resulting (strained) liquid is your kefir, and the grains in the strainer are now ready to be used again. Place them back in the (rinsed out) jar, cover with fresh milk, and repeat the process.
  7. Use the strained kefir right away, or refrigerate until needed. It lasts for weeks, if not longer, in the fridge (though it does get more tangy over time, as fermentation slows, but doesn’t stop completely).
  8. For smoothies: Blend kefir + whatever fruit/veg you like in a blender or food processor. I find that the best smoothies always have at least some frozen fruit in them, which makes everything extra thick and creamy once blended. My favorite is 1 frozen banana + 3/4 cup wild frozen blueberries + 2 cups kefir (and sometimes a scoop of this Green Superfood powder). If the mixture looks too thick, just dilute with milk, water, or, my favorite, coconut water.
  9. Consume smoothies immediately, or within a few hours at most. Real kefir is so alive that it will begin feasting on the sugars in the the fruit pretty quickly, so after a few hours, most of the smoothie’s sweetness will be gone. I always drink immediately.

Some Final Notes
–The kefir grains talked about in this post are also known as “milk kefir grains.” They can ferment dairy as well as non-dairy milk (such as coconut milk, which is excellent). “Water kefir grains” are different and are used to culture sugar-water instead of dairy. They can be found online at all of the places listed above. I’ve experimented with them, but prefer kombucha over water kefir in terms of non-dairy, fermented drinks.
–Avoid using any metal utensils or bowls when making kefir, as it can react negatively and produce off-tasting flavors. (A metal strainer is fine since you’re only using it for a minute.)
–Your first batch of kefir may take a bit more time to ferment, as the grains need to adjust and acclimate to your house and the milk you’re using.
–Your grains will grow in size and multiply as you keep using them, and as they do, they will be able to culture larger amounts of milk. A tablespoon of grains can culture at least 2 to 3 cups, sometimes more. If you find you can’t keep up, just give some grains away or discard a bit.
–If your kefir is too strong for your liking, try fermenting for only 12 hours, or add some fresh milk to an over-fermented batch and let things balance out. It takes some experimentation to get it how you like it.

Favorite Kefir Smoothie Flavors
Note that pineapple is the only fruit I’ve found that doesn’t seem to go well with kefir. Everything else is great (especially frozen banana—essential for ultra creaminess!).
♦ frozen banana + fresh or frozen strawberries or cherries + dash of vanilla or almond extract
♦ frozen or fresh banana + ½ really ripe avocado + honey
♦ frozen banana + 1 knob fresh turmeric + juice of one orange + honey (pictured at the top of this post)
♦ frozen mango + strawberries
♦ frozen mango + fresh banana (or vice versa on the fresh/frozen) + juice of one orange
♦ frozen banana + frozen wild blueberries (pictured below)

Kefir Smoothie 3

Stollen Bread

Stollen Toast 3

Back when I wrote about sourdough, I mentioned that I had a fruit & nut bread, also known as stollen, on my baking to-do list.

It’s since been baked. And I’m already down to my last few slices. It’s a never-ending cycle.

Stollen is one of my favorite breads of all time. I used to just make it for holiday gift-giving, but it’s now become a year-round staple. Soft and lightly sweet, it’s a yeast bread filled with dried fruit and nuts and a log of almond paste. When you cut the loaf, each slice yields a coin-sized amount of the paste, which you pop out and spread on top along with some butter and a little jam, if you like. Please tell me you’re sold. Whoever invented this deserves a medal.

I’d love to make a naturally leavened (aka sourdough) version of this bread one day, but for now, I’m fine sticking with the yeast version. It’s a nice change of pace from our more hearty loaves, and everyone loves it. When I go home to upstate New York to see my family, I can’t show up without a loaf or two (which my sister and I then hide and only have once her kids have already eaten so they won’t ask us for any. Sharing: 0, Us: 2).

If you’ve never made bread before or are “afraid of yeast,” as I hear people say, this is a great first recipe to try (especially for Easter!). Yes, it has a few ingredients, but the directions are very step-by-step and hard to mess up. In fact, this was one of the first breads I ever baked, and I’m still convinced that my very first loaf was actually better than any I’ve made since. If you’re going to capitalize on beginner’s luck, this is the loaf to use it on!

Stollen Loaf 2


Stollen
Recipe adapted from King Arthur Flour and the Food Network. If you don’t like nuts, you can leave them out, though I’d argue to give it a try as is first, as all the elements together really make it phenomenal. The original recipe uses candied fruit, but I can’t stand the stuff (it’s filled with dyes and additives), so I stick with dried fruit and just soak it first to make it soft. As for the almond paste, I’ve used both store-bought and made my own (using this recipe); both are great. You could use marzipan too, I would think, but it’s less almond-y and even more sweet than regular almond paste, so the outcome might be a little different. // Finally, note that this recipe take a couple hours from start to finish, though most of it is hands-off. Devote a Sunday afternoon to it, and you can look forward to a week of great toast!
Yield: two medium-sized loaves

For the dried fruit:
1 cup dried fruit, diced (l like to use a mix of dried cherries, golden raisins, dates, and figs)
1/4 cup rum or orange juice

For the sponge: 
1 (1/4-ounce) package active dry yeast
1/4 cup warm water (about 110 degrees F)
2/3 cup milk (I use whole)
1 teaspoon honey
1 cup unbleached all-purpose flour

For the dough:
1/3 cup honey
1 large egg, beaten
1 stick (1/2 cup) unsalted butter, melted and cooled
1 tablespoon finely grated lemon or orange zest
1 teaspoon salt
1/2 teaspoon ground nutmeg
1/2 cup toasted and chopped nuts (I like to use a mix of walnuts, almonds, pecans, and pistachios)
3 to 4 cups unbleached all-purpose flour
Oil, for coating bowl

For the filling: 
7 ounces almond paste (I like Odense brand, which comes in a tube), divided into two pieces

To prepare the dried fruit: Combine the dried fruit and rum or orange juice. Cover and set aside. Shake or stir the mixture every so often to coat the fruit with the liquid. I like to leave it overnight so my fruit is really soft, but a half-hour or so is fine too.

To prepare the “sponge”: In a large bowl or the bowl of your stand mixer, sprinkle the yeast in the water to soften. Heat the milk to 110 degrees F (just warm to the touch, not any hotter) and add it to the yeast along with the honey and 1 cup flour. Cover the bowl with plastic wrap and let rise until light and full of bubbles, about 30 minutes. This is your sponge.

If preparing the dough by hand: Strain the dried fruit mixture, discarding the liquid. To the bowl with the sponge, add the dried fruit, honey, egg, melted butter, zest, salt, nutmeg, nuts, and 2 cups of the flour. Stir vigorously for 2 minutes. Gradually add the remaining 1 to 2 cups flour, 1/4 cup at a time, until the dough begins to pull away from the side of the bowl; I usually end up adding about 1 1/2 cups total. Turn the dough out onto a lightly floured work surface. Knead, adding a little flour as needed, until the dough is smooth and elastic, about 6 to 7 minutes. The dough should be smooth and supple—not dry or crumbly, but not sticking to your hands either.

If preparing the dough in a stand mixer: Strain the dried fruit mixture, discarding the liquid. To the mixer bowl with the sponge, add the dried fruit, honey, egg, melted butter, zest, salt, nutmeg, nuts, and 2 cups of the flour. Using the paddle, beat the mixture on medium low speed for 2 minutes. Gradually add the remaining flour, 1/4 cup at a time, until the dough begins to pull away from the side of the bowl. Change to the dough hook. Continue to add flour 1 tablespoon at a time until the dough just begins to clean the bowl and feels supple, but not sticky or dry. Knead 4 to 5 minutes on medium-low.

First rise: Put the dough in a large, oiled bowl and turn to coat the entire ball of dough with oil. Cover with a towel or lid and let rise until doubled in size, about 1 1/2 hours. You’ll know the dough is ready when you press it gently with your finger and it takes more than a minute for the indentation to fill back out again.

To shape and fill: Turn the dough out onto a lightly oiled work surface. Divide the dough in half. Working with one half at a time, gently roll/press the dough into a 7 by 9-inch oval. Roll half of the almond paste into a log that is just a little less than the length of the dough (about 8 inches) and lay it on top of the dough, close to the center. Carefully roll the dough up into a loaf, pinching the ends together as you roll, so that the log of almond paste stays in the center and doesn’t stick out. Place the loaves on a parchment-lined or well-greased baking sheet, seam-side down, and cover with a lightly greased piece of plastic wrap (I cover mine with the top lid of a cardboard box, so it doesn’t touch the loaves but does keep away any drafts that would keep it from rising properly). Let rise for at 45 minutes, or until just about doubled and nicely puffy.

About 20 minutes before the loaves are ready, preheat the oven to 375 degrees F.

Bake the loaves (on the middle rack) for 25 minutes, or until the internal temperature of the bread reaches 190 degrees. If the loaf sounds hollow when tapped on the bottom, it’s done.

While the loaves are still warm, brush the outside with butter (this helps keep the crust soft). Place on a rack to cool completely before slicing.

Eat within 2 to 3 days, or slice and freeze. You can toast the slices directly from the freezer, no need to defrost. I like mine with butter and tart cherry jam.


Processed with VSCOcam with f2 preset

The first loaf of stollen I ever made. Had to dig up the photographic evidence to prove it. Been a winner since 2011.

Eating Habits, Part II

everyday breakfast

[For Part I, click here.]

I’ve always found it interesting to see/hear what people eat in a typical day. I mean, I cannot be the only one who thought that the best part of MTV’s Cribs was seeing what was in the fridge, amIright?

So here’s a quick glimpse at what a typical few days of eating looks like for me. While I’m obviously not as interesting as a celebrity, you may come across one or two things that surprise you (coughcough, Domino’s pizza, coughcough).

I wrote down every.single.thing, and looking back at it, it appears I eat a heck of a lot of food. (Do any of you out there keep a food journal? …because I found it slightly terrifying.) Perhaps I do eat more than others, but it’s important to note that it is all in moderation and I work hard to stop when I’m satisfied, not bursting at the seams. I gauge this by mostly by the fact that I can still happily think and talk about food even once I’ve finished eating. I don’t mean to say that I still feel hungry, but looking at a recipe or a photo of food doesn’t gross me out—if it does, I know I’ve gone overboard. (Try it for yourself next time you’re eating. Can you not even stand the thought of food after finishing your meal? If so, consider stopping a few minutes before you get to that point in the future.) This is a particularly important strategy for me because the majority of my work day is spent dealing with food-related things. It would be a shame to not enjoy that!

A few final notes before we get to it:

  • You will see four days documented here—three weekdays, and one weekend day. I didn’t plan in advance for this. It was just a normal week.
  • I took photos three out of the four days. If you hover over the images, a caption should give a brief description of the food, with detailed info in the text below. Please forgive the bad lighting/poor quality of some of the shots! I snapped these really, really quickly and some were taken with my smudged-up iPhone camera.
  • Any cooking I did was either just for me, or for both Suraj and me. Still, I cook in large batches, usually making enough to serve a family of 3 to 4, so we always have leftovers.
  • Unless otherwise noted with a brand, everything logged is homemade—this includes nut butter, jam, yogurt, kombucha, broth, bread, desserts, etc. As I mentioned in my previous post, I keep my sanity in this regard by making things in big batches well ahead of time, usually on the weekends, and freezing a TON of staple items. I keep track of it all in a digital list (the Evernote app) so I always know what I have, wherever I am. This is particularly helpful in planning meals a day or two ahead (my typical strategy) and making sure nothing gets wasted. Even with a small freezer and limited living space (my jam resides in the linen closet…), it IS possible to set up a system like this.
  • Wherever I could link to the recipe I used, I have.
  • Milk is always organic and whole, as mentioned in my last post.
  • I enjoy a small amount of carbs at every meal (sorry, Paleo people) and have a deep love affair with sourdough. Probably don’t even need to mention that again at this point.
  • There’s quite a bit of repetition/re-using of the same items (in different ways) here. My breakfasts are pretty standard and with a full-time job, lunch is nearly always leftovers reconfigured in some new way. Heck, sometimes dinner is that too. I’m guessing that’s the case for most of us though. Due to a very long commute (1 to 1 1/2 hours each way), I work from home two days a week, so on those days, I can at least make myself a fried egg, for which I am especially grateful.
  • It’s not really represented here, but we do eat out once, sometimes twice, a week (Friday nights guaranteed). Our go-to places are sushi, Sichuan Chinese (authentic, not American Chinese), and a local Mexican place. For lunch out, we either go for Vietnamese pho (soup) or South Indian vegetarian (dosas!). We aren’t really chain-restaurant people, as you can tell. And you already know we like spice.
  • I/We eat late compared to most Americans. Breakfast is around 10 am, when I start to feel hungry, lunch is around 2 pm, and dinner is not until 9:30 pm or later on most nights. This is what works best for us, and why I usually have a snack or two late in the afternoon or early evening. Late dinners are common practice in Europe and India, and most of the world I would guess, just not in the U.S. (I realize that it also helps that we don’t have small kids.)
  • There are more desserts listed here than what we would normally have, as I was doing some volunteer recipe testing for the baking chapter of an Italian cookbook (tough life, I know). When I’m testing stuff, I usually just keep a slice or two for us, then take the rest to work. Instant portion control.
  • I added in what exercise I did each day, as I do think that affects appetite. If there wasn’t so much *#@#! snow outside, there’d be a lot more walking in there, as that’s one of my favorite activities. I workout on weekdays, but not usually on the weekends. As for the yoga, I am impressed with myself that I went twice this particular week, but that was more just a strategy to avoid Boston evening traffic than any real commitment. Going forward, I’ll probably just go one night a week (and grocery shop on the other, if you really want to know).

Okay, on to the food!


Monday

Drive to Work: turmeric tonic (a good detoxifier to start out the morning), diluted with additional water
Breakfast: 1 1/2 small pieces sourdough rye toast (I bought this bread from the Amish months ago and keep it in the freezer at work), Kerrygold butter and 1/4 avocado smashed on top of one piece, and almond butter and jam on the other half // 1 hard-boiled egg // small cup of raspberries and blueberries // black tea with milk and 1 drop of liquid stevia (I use this minimally) // small glass kombucha (about 1/2 cup)
Afternoon Workout (lunch hour): 1-hour barre class
Lunch (packed leftovers; eaten at my desk): lemon rice // sautéed zucchini rounds // sautéed kale and collard greens with onion // 1 hard-boiled egg // 1 clementine // small glass kombucha
Snack: 1 piece fruit & nut chocolate (leftover from recipe testing)
Evening Workout: 1-hour yoga class (very basic—just my speed)
Dinner: roasted chicken (bones saved for broth; leftover meat saved for soup) // roasted broccoli and cauliflower // warm farro salad with cashews, garlic olive oil, and goat cheese (farro is a whole grain; as covered in my last post, it came straight from the freezer; I had previously soaked it overnight, cooked it, then froze it flat in a gallon-size bag; I just chipped off a piece for dinner and warmed it up with the other ingredients) // sauerkraut // glass of Mirassou Cabernet
Other: lots of water and tea, both herbal and black with milk
Supplements: probiotic pill (I don’t take these normally but just want to finish the container leftover from my post-antibiotic regimen) // dash of bitters in my water (this is an age-old practice that helps with digestion after meals; I am working with the company in the link provided on a book, and I love their products)

Tuesday

Drive to Work: turmeric tonic, diluted with additional water
Breakfast: 1 slice sesame sourdough (again, from the freezer), Kerrygold butter and 1/4 avocado smashed on top of one half, and almond butter and jam on the other half // 1 hard-boiled egg // 1 clementine // black tea // small glass kombucha
Afternoon Workout (gym @ lunch hour): 20 minutes stair-climber + 30 minute interval class (bodyweight exercises)
Lunch (packed leftovers; eaten at my desk): 3 small pieces Domino’s pizza (we had ordered this for the Oscars—it’s really the only takeout we get, and we have it just a few times a year, usually for parties, but I unashamedly love it. I probably should have had 2 slices, not 3, but I was starving from the gym) // 1 apple // celery sticks // Joseph’s-brand garlic hummus // small glass kombucha
Evening Workout: 1-hour yoga
Snack: gelatin fruit snacks (loosely based off this recipe)
Dinner: lamb stew with potatoes and carrots (leftover from the weekend) // multigrain sourdough with Kerrygold butter // sauerkraut
Dessert: small slice of ricotta & sour cherry tart (leftover from recipe testing) // small glass of milk
Other: lots of water and tea, both herbal and black with milk // 1 cup coffee with milk and 2 drops liquid stevia
Supplements: probiotic // dash of bitters in my water

Wednesday

[This is my work-from-home day.]
Upon Waking:
warm water with lemon (another good detoxifier)
Breakfast: blueberry sourdough waffle (again, from the freezer) with Trader Joe’s flax-chia peanut butter and Tropical Traditions coconut butter // 1 egg fried in olive oil // 1/3 avocado // Indian-style black tea with milk and 1 teaspoon sugar // small glass kombucha
Lunch: Asian-style chicken noodle soup (before the work day began, I put the leftover roasted chicken bones from Monday, some vegetables scraps, a few peppercorns, and water in a big pot on the stove, and let it simmer all morning. By afternoon, I was able to strain the fresh broth and use it for lunch [and dinner]. I spiked the lunch broth with a dash of soy sauce, a dash of fish sauce, and miso paste, then added the leftover roast chicken meat, thinly sliced onion/garlic/ginger, kale, and a packet of ramen noodles, discarding that flavor/sodium bomb packet thing. I garnished it with scallions and Thai basil, both of which were also leftover from previous meals. The whole thing took less than 20 minutes.) // small cup of yogurt with crushed nuts, dried cherries, and raw honey
Snack: small Starbucks coffee with h&h and sugar (Suraj picked this up for us) + 2 small pieces fruit & nut chocolate (so yeah…that recipe was a total winner…)
Evening Workout: 30 minute swim
Dinner: mussels in garlic-cilantro broth (same base broth mentioned above—there’s a million ways to dress it up!) // leftover sautéed zucchini and roasted cauliflower // multigrain sourdough
Dessert: 2 Lindt sea salt chocolate truffles (my all-time fav chocolate/weakness) + small glass of milk
Other: shot of beet kvass (fermented beet juice, another great, cleansing drink; I will post about it sometime)
Supplements: probiotic // fermented cod liver oil

Weekend (Saturday)

Upon Waking: warm water with lemon
Breakfast: savory Indian pancakes (also known as moong dal cheela—they’re made from soaked lentils and they’re awesome!) with Fage whole-milk Greek yogurt, garlic chutney, ghee, and store-bought Indian pickle // 1/3 avocado // fresh fruit salad // small glass kombucha // Indian-style black tea with milk and 1 teaspoon sugar
Lunch: ribollita soup (I used cooked beans from the freezer, prepared as covered in my last post) // raw-milk cheddar // apple slices
Snacks: one small piece of biscotti (more recipe testing) + cappuccino // kefir smoothie (kefir + frozen banana + strawberries + coconut water)
Dinner: bayou dirty rice (I am trying to eat more liver because it’s so good for you, and this was a great recipe for hiding it in) // shrimp in a tomato-veggie sauce // champagne (a Saturday night staple!)
Dessert: one scoop Haagen-Dazs vanilla ice cream with peanuts and “magic shell” chocolate sauce (just chocolate and coconut oil, melted down together—we keep a jar of it the fridge and pop it in the microwave for a minute to re-melt, then drizzle on ice cream and it hardens instantly)
Exercise: None, unless you count standing at the stove
Other: oolong tea


So that’s everything! I hope it’s been useful, and that you see that nobody’s perfect—and that that’s not the goal. Build on what you can do, and go from there. Maybe you start out following the 50/50 rule (eat your best half the time, let the other half slide), then go for 60/40 the next week. Remember that whatever you can do is a step in the right direction!