No-Bake Chocolate Peanut Butter Bars

PB Choc Bars

The power of suggestion.

I saw a post on Facebook about a week ago with this recipe, just before I was about to go to bed. Since I knew I’d never remember it the next day, I took a screenshot of the recipe with my phone.

A couple days later, in the midst of the “Juno” blizzard here on the East Coast (read: with plenty of time on my hands), I rediscovered the recipe while scrolling through my photos and immediately went to the kitchen to make them.

I didn’t have oats like the recipe wanted me to (and there was no chance of leaving the house to get them), but I did have some puffed rice cereal, so I made a couple of swaps. The end result was fantastic. Like a healthy Kit Kat bar. The perfect treat for that 3 pm slump, or the kids’ lunch box. Or your lunch box. Or a blizzard.

PB Choc Bars Close-Up


No-Bake Chocolate Peanut Butter Bars
Adapted from the blog I Hear Exercise Will Kill You. For the cereal, try to choose something with the fewest ingredients as possible. I used a combination of Erewhon brand Crispy Brown Rice cereal (ingredients: organic brown rice, organic brown rice syrup, sea salt) and Enjoy Life brand Crispy Flax cereal (ingredients: whole sorghum flour, ground flax seed, honey, raisin juice concentrate, salt). You can also substitute oats, but the bars won’t have the same crunch factor. And if you don’t like coconut, I personally don’t think you can taste it here, but feel free to substitute more puffed rice, or some dried fruit, or even almond meal. Makes 20 to 25 small squares. 

1/2 cup natural peanut butter
1/4 cup honey
1/4 cup coconut oil
1 1/4 cups crisped rice cereal
1/3 cup crushed peanuts or other nuts (optional)
1/2 cup unsweetened shredded coconut
1/2 cup + 2 tablespoons semi-sweet chocolate chips
1/2 teaspoon vanilla extract
Sea salt, for sprinkling on top (optional)

Grease a square (8 x 8 in) pan or line with parchment paper. I like to grease the pan with a little coconut oil, then lay a piece of all-natural parchment on top of that (the oil helps it stay down), with the paper overhanging on two sides. Then, once it’s firm, I use the paper sides as “handles” to gently pull the whole square out of the pan.

Melt peanut butter, honey, and coconut oil over medium-low heat. Once melted, remove from heat and add cereal, peanuts or nuts (if using), shredded coconut, chocolate chips, and vanilla. Stir until chocolate is entirely melted. Pour into an 8×8 pan and sprinkle a little sea salt over the top.

Place in the fridge and chill at least 2 to 3 hours, until completely set. Cut into squares and enjoy. Store in the fridge.

Advertisement

Simple Braised Carrots

Carrots Edited

I made these carrots on a Sunday afternoon a few weeks ago, to have on hand for meals throughout the week. I do this a lot (i.e., cook tons of stuff on Sunday for the week), mostly because I’m a fanatic about packing healthy lunches for myself—I’m not exaggerating when I tell you that the only time I go out for lunch during the week is if it’s for a business meeting. I much prefer squeezing a workout into my lunch hour instead and then having something healthy at my desk once I’m back. Refreshing exercise + wholesome food > greasy takeout + food coma.

So back to these carrots. I had picked up a huge bunch because they were on sale (and organic, so a total steal) and decided to braise them instead of roasting because my oven was already full. Braising may sound fancy, but it’s really not. It’s basically just browning the food, then cooking it in a little liquid until done. You can do it with meat, vegetables, whatever.

In this case, the end result is deeply flavored, naturally sweet, and perfectly cooked carrots that taste just as good as they look. I hope you give them a try—whether it’s Sunday afternoon or any other day of the week.


Simple Braised Carrots
If you own a cast iron pan, I really recommend using it here (and if you don’t have one, grab one the next time you’re at a garage sale or thrift store—they’re one of the best things you could find there). They’re also a much healthier option than non-stick cookware.  

5 to 6 large carrots, washed (no need to peel, especially if using organic)
1 to 2 tablespoons olive oil
Kosher salt and pepper, to taste
1/4 to 1/2 teaspoon dried thyme or whatever herb you like (oregano, coriander, etc.)
One spoonful honey
1/2 cup vegetable or chicken broth, or water

Slice your carrots in half and put the smaller ends aside. Slice the larger (stem) ends in half lengthwise.

Add the oil to your cast-iron pan or a large saucepan and heat until very hot but not smoking. Place the carrots in the pan, arranging those you sliced in half flat side down. You want as much of the carrot’s surface to touch the hot pan as you can, so you get a nice sear (searing = flavor).

Let the carrots sizzle and brown for at least 5 minutes, checking periodically and turning as needed. (The good thing about using cast iron is that when the food is properly seared, it releases naturally from the pan, so don’t move the carrots unless they’re ready to go.) Flip to brown both sides.

Once browned, sprinkle the carrots generously with salt and pepper and whatever herb you’re using. Drizzle the honey over the top of the carrots. Slowly add your liquid (I really prefer homemade chicken broth here, but it’s totally up to you); It will sizzle and deglaze the pan a bit. The liquid should come just about halfway up the sides of the carrots. Turn the heat down to a simmer and partially cover.

Cook the carrots for 20 to 25 minutes, turning as needed and adding a bit more liquid if it becomes too dry (though it’s okay if most of it evaporates). Test for doneness with the tip of a knife—it should pass through the thickest part of the carrot without much resistance when done.

Serve warm, with a little balsamic vinegar on top if you like. Pack leftovers for healthy lunches!

Typical work lunch (please forgive the florescent lighting).

Typical work lunch (please forgive the florescent lighting). Carrots, green beans, basmati rice, hard-boiled egg, avocado, peanuts, and a dash of tamari (soy sauce).

Sprouted Spelt Chocolate Chip Cookies with Sea Salt

Cookies on Tray

In high school and college, I had a pretty rough relationship with my weight. [This circles back to cookies, I promise; just keep reading.] This is something that those who knew me back then might remember well, but something that those who know me now might not even be aware of (…surprise). I don’t talk about it a lot. Or ever, really. I’m not sure why. I guess no one really enjoys bringing up past embarrassments, or times when they were not their best. But in this little corner of the internet at least, I’m wondering if it’s worthwhile to acknowledge, just so people understand that I’ve been on all sides of the health spectrum. I know what’s it’s like to struggle with weight, but I also know how it feels to come out on the other side (where I plan to stay, permanently). I’m certainly not here to preach, but I would like to share with you what I know, in the hopes that we can all get to where we want to be.

So here are the basic facts of my story: I was overweight for most of my adolescent years. At 14, my doctor recommended the Weight Watchers program to me. I signed up (well technically, my mom signed me up, ha), followed the program, learned a ton, and lost about 50 pounds.

I kept the weight off for about a year, only to have it slowly creep back on as I entered my final year of high school and then college. Obviously, neither of these times are an especially great time to be overweight (I still thank and appreciate everyone who was kind to me back then).

By the summer after my freshman year of college, I had had enough. I wanted to be healthy again—and happy too. Using the basics I had learned before, I began making simple changes on my own: eating less and exercising more. I didn’t cut out anything entirely (I was stuck eating dining hall food, after all), I just became more conscious of how I was fueling, and treating, my body. Over the course of the next six months, I lost more than 60 pounds and finally reached my goal weight. For the first time, I felt like the real me—both on the inside and the outside. It was the most freeing experience of my life.

That was 13 (!!) years ago now. In that time, my interest in health and nutrition has gone from a prescription, to a personal interest, to a career, to a lifelong devotion (and now to a blog!).

People still ask me what “the secret” to good health is, and I always answer with the most honest—albeit the most boring—response: moderation and real food

To me, that’s really it. The second you start cutting out entire food groups, or eating more things out of a package than out of a garden, things go down hill. You feel unfulfilled, both physically and mentally, and a dangerous cycle begins.

This is why I do not follow any “diet,” per say, and but instead choose to simply celebrate foods that are nourishing, wholesome, and real.

This is why I value balance, not perfection, above all else.

This is why, every once in a while, I treat myself to a cookie.


Sprouted Spelt Chocolate Chip Cookies with Sea Salt
Sprouted spelt flour is made from spelt grains (an ancient type of wheat) that have been sprouted and then ground into flour. Much like the process of fermenting (see my sourdough post), sprouting helps unleash hidden nutrients in the flour, and makes it easier for us to digest. Flour made from sprouted grains is richer in vitamin A, vitamin C, B vitamins, calcium, iron, magnesium and potassium, with fewer calories and carbohydrates. More importantly, it makes these cookies superbly delicious, as spelt flour is mildly sweet and nutty in nature, and therefore great in baked goods. The cookies are soft and chewy on the inside, with delicately crisp edges. Just be sure not to overbake them—10 to 12 minutes is key for keeping them soft.

2 cups sprouted spelt flour (I like One Degree brand; I find it at Whole Foods)
1/2 teaspoon baking soda
1/2 teaspoon kosher salt, plus more for sprinkling
8 tablespoons (1 stick) butter, melted and cooled (you can sub coconut oil for half the butter if you like)
3/4 cup light brown sugar or coconut sugar
1 large egg
1 large egg yolk
1/2 teaspoon vanilla extract
1 cup semisweet chocolate chips or chunks

Preheat your oven to 325 degrees. Line a baking sheet with parchment paper.

In a medium bowl, whisk together spelt flour, baking soda, and salt; set aside.

In a stand mixer or with beaters, beat the melted butter and brown sugar (or coconut sugar) on medium speed until it combines into a caramel colored syrup, 1 to 2 minutes. Beat in the whole egg, egg yolk, and vanilla extract until combined, scraping down the bowl as needed.

Reduce the mixer speed to low and slowly add the dry ingredients, mixing just until combined. Mix in the chocolate chips.

Using a small scoop (I use a 1-inch cookie scoop), portion out 12 to 18 cookie dough balls. Place however many as you’d like to bake on your baking sheet. I like to just bake a few at a time, and freeze the rest for another day (instant portion control). The frozen ones don’t even need to be thawed; just bake an extra minute or two.

Sprinkle a pinch of kosher salt on top of each cookie; I use Morton brand, or Maldon if I’m feeling really fancy—just a few flakes will do. Bake for 10 to 12 minutes, until the edges are just slightly golden but the centers are still soft and puffy.

Let the cookies cool on the baking sheet for 10 minutes, then serve warm or transfer to a wire rack to cool completely.

Cookies on Plate

No-Knead Sesame Sourdough

Sliced Sourdough

If there is one thing that you will always find stocked in our freezer, it’s bread. Right now, we’ve got a loaf of regular wheat (this King Arthur recipe is a favorite) and three kinds of sourdough: Amish rye, sandwich-style multigrain, and sesame. I also have a loaf of fruit & nut on my to-do list. We really like toast around here.

Baking bread is my yoga. It calms me, it focuses me, and it fulfills me. It’s a process that takes time, but rewards you infinitely for the commitment.

More often than not, the bread I bake is made using a sourdough starter rather than store-bought yeast. What is a sourdough starter? It’s basically just a mixture of flour + water that has sat out over time, acting like a net and collecting all the healthy microbes and yeasts from the air. It’s “wild yeast” by definition and it’s super healthy for us because it is made up of good bacteria (yes, there is such a thing), which is essential for healthy digestion as well as our health overall. You’ve heard of probiotic foods, right? Well, sourdough is one of the best.

If you are someone who would much rather just buy sourdough bread than bake it, that’s fine too! Just be sure to look at the ingredients. The label should say: “flour, water, and salt” and possibly “sourdough starter” or “natural culture” (which, again, is just flour + water but some people include it). It should not contain yeast. Most local bakeries have a true sourdough—just ask!

Here are few more facts if you’re keen to learn more:

  1. Sourdough bread is healthier than regular (yeast) bread because it is fermented. Sourdough starter helps break down the many of the nutrients found in flour that our bodies cannot access otherwise. You know those microbes I just mentioned? Well, they’re responsible for eating all of the “anti” nutrients in the flour, and their pre-digestion in turn makes your digestion of the bread a breeze—they do the work for you, quite literally (those holes you see in the crumb are, in fact, their handiwork). The longer the bread dough sits/ferments before baking, the more work they can do, and the better the final bread is for you. This is why a lot of people find true sourdough bread easier on their stomachs than any other type of bread. Many people with gluten issues can even tolerate it.
  2. Sourdough baking is the traditional way of baking bread, one humans have relied on for at least 6,000 years. Commercial yeast is a very, very new thing; sourdough bread is ancient. I like to trust our ancestors. Pretty sure they wouldn’t have spent days carefully making their breads if there wasn’t a good reason for it.
  3. Sourdough tastes better. Sourdough breads have a much deeper flavor. I know some say they don’t like the sourness, but this certainly varies by recipe, and I also truly believe it’s one of those tastes that builds on your palette over time (seriously, does anyone like coffee the first time they try it? same kind of thing). Suraj, my partner, can definitely attest to this. The first few slices he wasn’t completely sold, but he now happily eats an egg sandwich on sourdough sandwich bread almost every morning.
  4. It’s exciting! I feel so empowered when I see my dough rising and take my finished loaf out of the oven. “Look what I did! With only air!” Harnessing the natural, wild yeast in our environment to create food is just such an extraordinary, ordinary idea, isn’t it?
  5. It’s easy. I realize this sounds hard to believe, but it’s true. Sourdough requires only three ingredients: flour, water, and salt. Oh, and time. That’s it. The techniques—resting, folding, shaping, etc.—can all be adapted based on what works best for you and your schedule. It’s really hard to mess up.

“In the long slow fermentation that produces sourdough bread, important nutrients such as iron, zinc and magnesium, antioxidants, folic acid and other B vitamins become easier for our bodies to absorb. Diabetics should note that sourdough produces a lower surge in blood sugar than any other bread: in a 2008 study published in Acta Diabetologica, subjects with impaired glucose tolerance were fed either sourdough or ordinary bread: the sourdough bread produced a significantly lower glucose and insulin response. In the sourdough process, moreover, gluten is broken down and rendered virtually harmless. In one small Italian study, published in the journal Clinical Gastroenterology and Hepatology, in January 2011, celiac patients fed sourdough bread for 60 days had no clinical complaints, and their biopsies showed no changes in the intestinal lining.” —The Guardian

I’ve maintained my sourdough starter for a few years now, which I first purchased from King Arthur (uh, can you tell I like them?). I’ve since learned I could have just as easily made one on my own (see link here), but whatever, it was $8 well spent.

If you don’t yet have a sourdough starter, I really encourage you to start or buy one (heck, I’ll even mail you some of mine). They are easy to maintain and can just be kept in a jar in the fridge when not in use. That’s where I keep mine, taking it out weekly to feed it a little more water and flour (in equal parts), discarding any extra. There have been weeks where I’ve forgotten to tend to it, and it’s been fine. I see people claim they’ve “killed” theirs, but I doubt this every time. Starters are resilient creatures. They don’t go down without a fight.

When you want to use your starter in a recipe, just take it out of the fridge and feed it every 4 hours or so, until it’s bubbling nicely and doubles in size each time you feed it—after a few feedings, it’s ready to go. I use it to make pizza dough, English muffins, pancakes, waffles, and even cake.

I have quite a few favorite sourdough loaves, but I wanted to share the easiest one with you today: a no-knead sesame sourdough. It’s the one I make when I have no time or energy, but still want to enjoy a fresh, warm loaf of bread the next night at dinner. The whole process takes about 20 hours start to finish, but only about 10 minutes of that is hands-on time. I usually mix the dough together around 9 or 10 pm, then bake it around 6 or 7 pm the next day, when I get home from work

This long fermentation/sitting time makes the final taste and texture of the loaf incredible—deeply nutty from the sesame seeds, with a soft, chewy interior and a crisp crust. Like something you’d get imagine standing in line for for hours at a trendy artisan bakery in San Francisco (not that I’ve done that or anything… ahem…). It’s also destined to be the best toast you’ve ever had; see my two favorite combos at the end of this post.

If you are still on the fence about obtaining a starter or have questions, ask away. You can also just use store-bought yeast in this recipe. It’ll still have great flavor, and about 50 ingredients less than a store-bought loaf. Whatever it takes to convince you give bread-baking a try! I promise it’s worth it.

Full Sourdough


No-Knead Sesame Sourdough
Adapted from the New York Times’ No-Knead Bread recipe. Note that weight/gram measurements are most precise, but either works. Makes 1 large loaf.

1 cup (5 oz.) white whole wheat flour
2 1/2 cups (11 oz.) white bread flour
1/3 to 1/2 cup white sesame seeds
1 1/2 teaspoons table salt
1 1/2 cups purified water
1/4 cup sourdough starter, or 1/4 teaspoon instant yeast

Dry-roast sesame seeds in a small pan over medium heat. Watch them carefully and stir frequently; it should take around 5 minutes to toast them. You want them to turn a deep golden color and smell fragrant, but don’t take your eyes off them because they can burn very easily. Let cool while you gather your other ingredients.

Combine the flours, salt, and sesame seeds in a large bowl. Mix in water and starter (or yeast) until incorporated; you don’t have to mix it a ton, just enough so that there’s no dry flour remaining. It will look pretty shaggy and messy.

Cover with plastic wrap or a lid and let sit at room temperature for 12 to 18 hours, during which it will do some fermenting and rising. If you’re not a big fan of that tangy sourdough flavor, aim for the shorter (12-hour) timeframe. I like to put my dough in a large (8-cup) Pyrex glass bowl and cover with a lid, then put it up on a shelf in my cupboard. A dark place is best. You could just cover with a towel on your counter too.

After you’ve let it sit, you should see that it’s bubbled up nicely (this is why I like using glass—helps give you a visual of what’s going on in that dough). It will be sticky and a bit wet too.

Lightly flour a work surface and place dough on it; sprinkle it with a little more flour and fold it over on itself once or twice (I found this video super helpful for this). Cover loosely with plastic wrap or a large bowl and let rest on the counter for about 15 minutes.

Using just enough flour to keep dough from sticking to work surface or to your fingers, gently and quickly shape dough into a ball. Generously coat a cotton towel (not terry cloth) with flour or line a bowl with parchment paper (my preference) and put the dough seam side down on the towel or in the bowl. Dust the top with a little more flour. Cover and let rise for 1 1/2  to 2 hours. The dough should rise slightly (more so if using yeast)—it’ll spring up much more once it hits the heat of the oven, so don’t worry about it rising too much here.

At least a half-hour before dough is ready, heat oven to 450 degrees. Put a 6- to 8-quart oven-safe heavy covered pot (cast iron, enamel, Pyrex, or ceramic) in oven as it heats—as always, I use my le Creuset dutch oven.

When dough is ready, carefully remove pot from oven. Slide your hand under towel and turn dough over into pot, seam side up; it may look like a mess, but that is okay. (If you’re using parchment like me, you can just carefully pick up the parchment by its sides and transfer the whole shebang into the pot. The parchment will darken when baking, but it shouldn’t burn—see photo above.)

Cover with lid and bake 30 minutes, then remove lid and bake another 15 to 30 minutes, until loaf is beautifully browned. Cool on a rack. If you can wait until it’s cooled a bit to cut it, the texture will be better, but  I understand if you find that to be a ridiculous request.

Eat and rejoice.

Tahini Toast

Favorite toast #1: salted butter + bitter orange marmalade + tahini + raw honey.

Avocado Toast 2

Favorite toast #2: butter + avocado + salt.

Slow-Cooked Garlic Green Beans

Bowl of Green Beans

After my last lengthy post, I wanted to switch gears and share a simpler dish that has become an absolute staple of ours these last few months. It’s a recipe based off of one I first read about on one of my favorite blogs, Food Loves Writing (and I don’t just say that because Shanna and Tim are former authors of mine—shoutout to einkorn!—and truly great people), but because their blog is full of inspiring stories, recipes, and photos alike. Case in point: Tim’s Italian-Style Green Beans, which call not for blanching or pre-cooking the beans, as almost all green bean recipes do, but rather slow-cooking them on the stove from start to finish, in a luxurious bath of olive oil, garlic, and tomatoes.

Intrigued, I gave it a try (skipping the tomatoes because I had none) and upping the garlic because we’re allium fiends around here. And… they were the best damn green beans I ever had. I don’t know why I had always assumed cooking green beans for too long would make them tasteless (school cafeteria flashbacks, maybe?), but in this recipe at least, the opposite is true.

I’ve made them for both Thanksgiving and Christmas (I think they might be replacing all the holiday green bean recipes that came before them), and nearly every week here at home. Suraj and I could finish the entire batch in one sitting.

In terms of choosing what green beans to use, I love the frozen haricots verts (thin green beans) from Whole Foods. They’re organic (which is important to me in this case because conventional green beans are high in pesticides); they’re washed, trimmed, and ready to use; and they’re even cheaper than fresh, at around $2.30 for a 1-lb bag, but just as nutritious. Can’t beat that. You don’t even need to thaw them. Just toss ’em straight from the bag into the warm, garlicky love bath that awaits them.

Bag of Green Beans

Oil, Garlic, Red Pepper Flakes


Slow Cooked Garlic Green Beans

1/4 to 1/3 cup olive oil
5 to 6 cloves of garlic, finely chopped
Pinch of red pepper flakes
1 1-lb package trimmed green beans, fresh or frozen (unthawed)
Kosher salt

You’ll want to choose a large pot with a lid for this. I use my le Creuset dutch oven (pictured above), as I do for nearly everything. It is indispensable, and particularly great when stuck using an electric range, as the weight of the pan keeps the heat/burner at a more steady level.

Cover the bottom of the pan by about 1/4 inch with olive oil and turn the heat to medium-low. Let the oil warm up for a minute or so, but don’t let it get too hot. You don’t want the garlic to brown or burn when it’s added, just sizzle lightly.

Add the garlic and however big a pinch of red pepper flakes as you like. Let everything swim around in there for a minute or so, adjusting the heat as needed. Again, you don’t want it to brown at all, but rather just bathe in the oil and perfume it with garlic.

Add your beans. I don’t even thaw the frozen ones (if they’re a little icy on the outside, just pat them dry first). Stir to coat and distribute the garlic and oil.

Turn up the heat to medium (this is a 5/10 on my dial), cover, and allow the beans to cook for at least 20 to 25 minutes, stirring every 5 minutes or so. This long, slow cooking process helps infuse the beans with the garlicky oil. If your beans are larger, this will take longer—upwards of 40 minutes if you’re using fresh, thick-style green beans. They’ll eventually slacken and lose a bit of their bright green hue, but I assure you their flavor will more than make up for it. Some will even get some browned edges; these are the ones you’ll want to hide away for yourself only.

Toward the end of your cooking, add kosher salt to taste. Green beans need quite a bit of salt, so don’t be shy. I add a good teaspoon at least.

Serve with rice, roast chicken, or whatever you like. I particularly love these Asian-style, with soaked* brown rice, a few peanuts, a dash of tamari (soy sauce), and a fried egg. Minus the egg, that’s what going on in the top photo.

[*I always soak my brown rice overnight, before cooking, to help break it down and make it easier to digest. To do so: cover the uncooked grains with filtered water and 2 tablespoons apple cider vinegar. Soak overnight, then rinse, drain, and cook as normal. If you’re using white rice, you can skip this completely—it has no outer bran, so nothing needs to be broken down.]

Finished Green Beans

Indian Breakfast: Dosa & Iddly (Also, Hi)

dosa batter

“To begin, begin.” -William Wadsworth

And so that’s what I’ll do.

This blog has been a thought of mine for years now. Cooking and sharing are two of the things I treasure most in life, so a blog would seem a natural fit for me, no?

Well, yes and no. While food is my life (more about me here), I’ve struggled with the idea of spending more time in front of the computer, since I already do that for 8+ hours a day. I’ve also convinced myself time and time again that “I have nothing new to add” and that “there are so many blogs out there already.”

Those close to me have all responded to those questions pretty much exactly the same way, however: “Yes, you do!” and “So what?!”

And so here I am. Because I’ve realized they’re right; I do have something to add. [In fact, we all do.] And I’d love to share it.

The food I make is many things, but above all it is real, it is honest, and it is thoughtful… qualities I value in what I eat, but also in who I am, and who I work to be (imperfections included and accepted).

And that just might be worth sharing, yes? I really hope so.


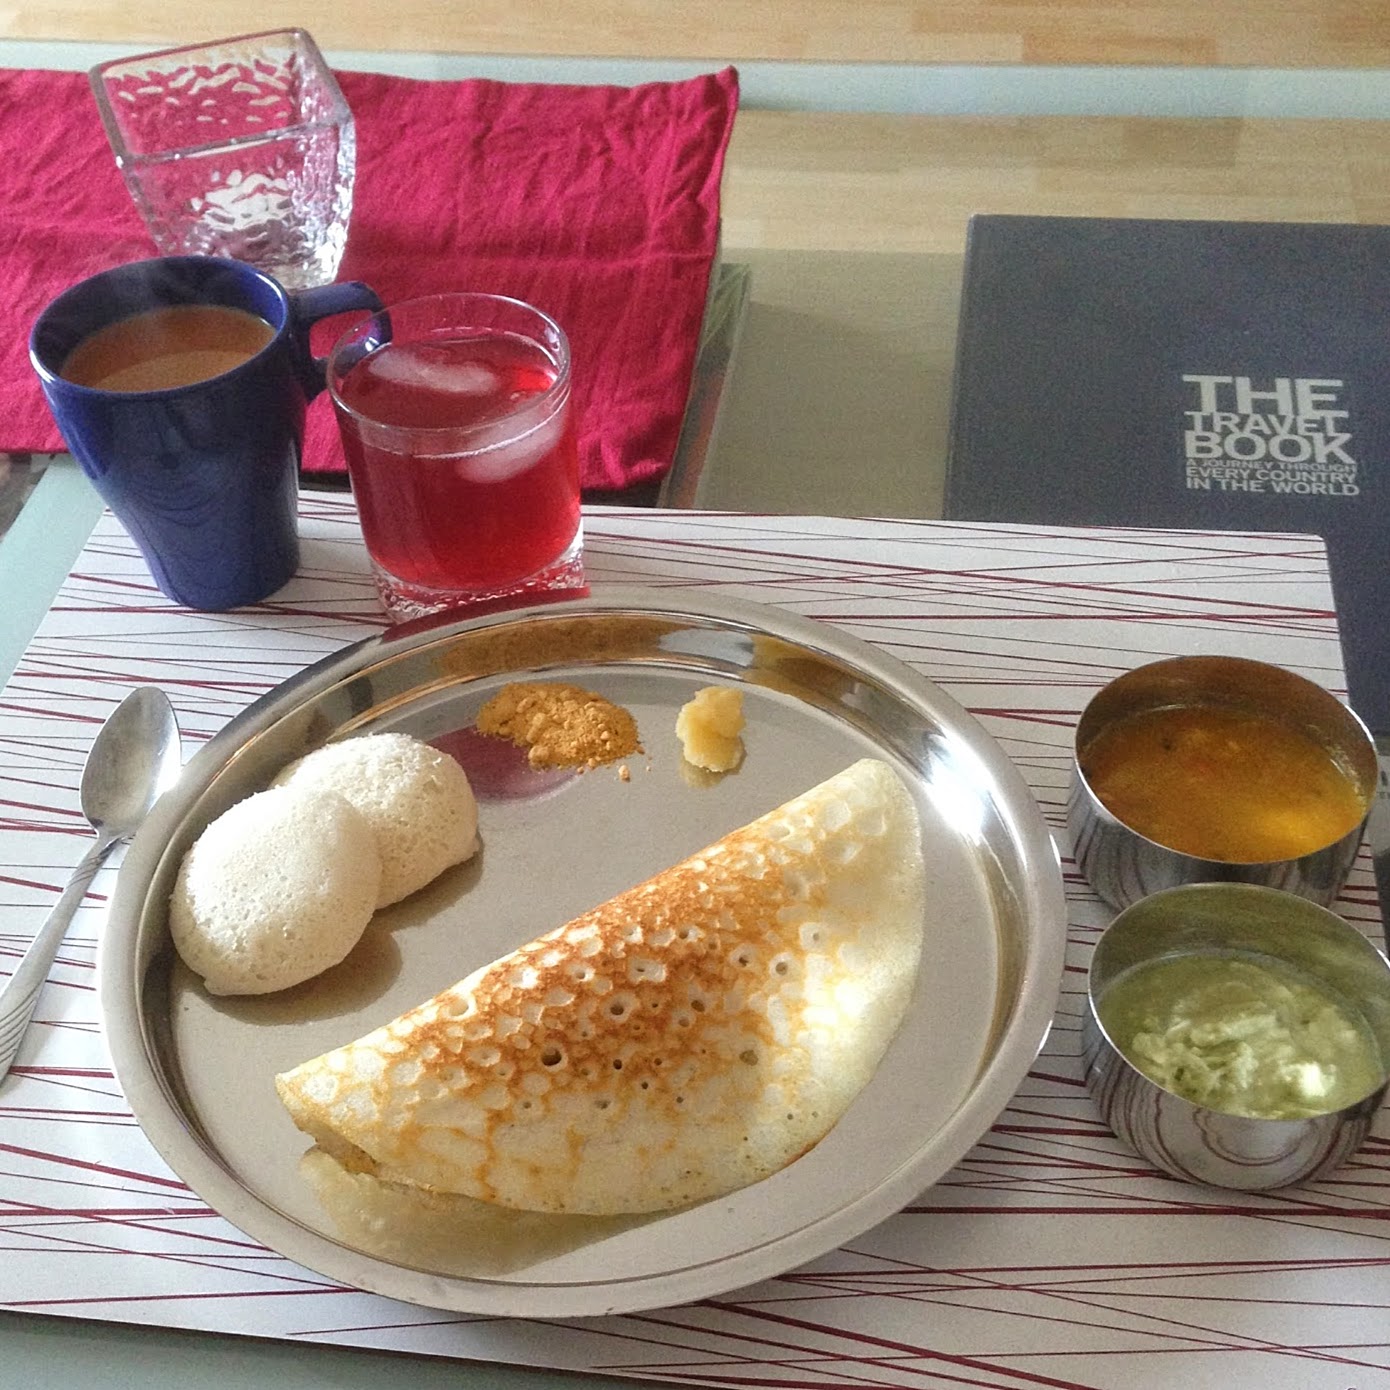
So let’s get to it! I’ve decided to start first with what is perhaps my favorite food on Earth: dosa/iddly. It’s a food that showcases many of the things I love—namely, breakfast, Indian food, and fermentation—and its flavor is like nothing else, so I’d say it’s an obvious first choice. Every time we go to India, it is the first thing I request. I don’t think I will ever tire of it.

Dosa and iddly are two versions of the same product: a batter of ground and fermented rice and lentils. For dosa, the batter is used to make crepes, whereas for iddly, the batter is steamed into (savory) cakes. Dosa can be filled with a spicy filling (usually potatoes), and iddly is typically served with sambar and chutney. It’s a breakfast that has been a staple of Indian cuisine for centuries, and it makes sense why—it’s healthy, it’s fermented (read: easy on your stomach and good for digestion/your gut), and it is very inexpensive to make. One batch will give you at least three days of breakfasts.

While this recipe is lengthy (I swear not all the recipes to come will be nearly as long! I just really want you get it right!), the process is pretty simple: soak your ingredients, grind them in a blender, let them sit out and ferment (where they’ll get all bubbly and tangy and wonderful), and either cook them like crepes (dosa) or steam them into cakes (iddly).

Dosa & Iddly
Fermented Lentil-Rice Crepes and Cakes

dosa

3 cups iddly rice
3/4 cup whole urad dal
1 teaspoon fenugreek seeds (optional–see Notes)
2 teaspoons kosher salt

Place the iddly rice in one bowl, and the urad dal + fenugreek seeds in another. Rinse each once, then cover both with filtered water—the water should come up at least an inch or two over the grains. Allow to soak—on the counter, uncovered—for at least 4 hours. I typically start soaking around 11 am, so that I can blend together around 3 pm, then ferment overnight.

Once soaked, you’ll need to grind each mixture separately. Start with the dal + fenugreek, adding enough of the soaking water to keep things moving. A high-speed blender like a Vitamix is ideal for this. You want the batter very smooth, almost silky in feel, so that when you rub some between your fingers, there is no grittiness. This takes at least a few minutes of blending, even in the Vitamix. It should look like a thick vanilla milkshake when it’s done.

Transfer this batter to your fermentation vessel—I use my large le Creuset dutch oven to ferment in, though glass also works well (avoid metal). If all goes well, your batter will be nearly doubling in size, so you want something with room to spare.

Repeat the grinding/blending with the rice and a bit of its soaking water (no need to wash the blender). It’s okay if the consistency of this batter is a little more gritty—like tiny, tiny pieces of sand—than the urad dal batter. Add this batter to the urad dal batter, then add the salt.

Use your hands to combine the two batters and the salt. This helps pull in more wild yeast, and it also helps you gauge consistency: You want the batter to pour off your fingers like thick cream. It should come off them in a nice stream, not like water, but not thick like yogurt.

Once combined (and you’ve washed your hands), take note of your batter line—ideally you want the batter to rise well above this, so you could mark the outside of the container with a piece of tape or marker if you don’t think you’ll remember. Cover the vessel lightly. You can use cloth, plastic wrap, or even the lid if it allows for a little air flow but still keeps the warmth in. I use plastic wrap and then cover with a light cotton dishtowel.

Move the vessel to a very warm place (75 to 80 degrees is ideal) and allow it to ferment for 12 to 18 hours. I put mine in the cupboard above the refrigerator and it works like a charm, usually taking about 17 to 18 hours for a hefty rise. It seriously feels like Christmas morning to me waking up to see if my batter has risen! But maybe this is just me.

Once your batter has risen, it should look crazy bubbly and beautiful (see photo at the top of this post). It will also have a slightly tangy smell. If nothing has happened, cross your fingers and give it some more time. Sadly, if it never rises, it’s hard to save things and I recommend starting over, considering the suggestions mentioned in my Notes below.

Assuming things have worked, congratulations!, it’s time to make your iddly and dosas! I like to steam a few iddly first (usually about 16—they’re small and you’ll have a lot of batter), then use the rest to make dosa.

To make iddly: You will need a steamer for this, and some sort of small cups (like ramekins) to steam them in. You can also buy an iddly steamer for relatively cheap if you plan on making them a lot–I think I got mine for about $15 from the Indian grocery store.

Either way, grease your molds with a little oil or ghee and gently scoop out some of the batter, filling to about 3/4 of the way full. You really don’t want to stir down or crush those beautiful bubbles in the batter—they are what make the iddly taste like little clouds. Be gentle.

Steam the iddly for 12 to 15 minutes—you will know they’re done when (after cooling down for a minute), you touch the top and it feels dry. Leave in their molds for a few minutes before removing.

To make dosas: Stir down the batter and add a bit more salt (1/4 to 1/2 teaspoon maybe). You may also need to add some water–the consistency should be somewhere in between crepe batter and pancake batter. It should pour easily off a spoon.

Heat a pan on the stove to medium heat. I use two cast iron flat griddle pans, which are perfect because they hold the heat well and also don’t have tall sides that interfere with spreading. The also make the dosa nice and crispy. You can use non-stick if that’s all you’ve got.

Spread a little oil onto the pan, then take a ladleful of the batter (about 1/4 cup), and pour it in the center (remember, the pan needs to be hot so that batter “sticks” immediately). Using the bottom side of the ladle, spread the batter out into a larger circle, working from the center out, and always in the same direction (clockwise or counterclockwise). You want the batter spread really thin. This takes practice but don’t fear! You’ll get the hang of it. I watched so many youtube videos before mastering it myself that I should probably send those people a check.

Allow the dosa to cook for a minute or so, sprinkling a little oil around the edges as needed. It should brown and release itself from the bottom of the pan on its own, or with just a little bit of help from your spatula. I typically do not cook the other side because it doesn’t need it, but if yours is thick and you think you need to, go for it.

Serve the dosas (and the iddly) hot with whatever spicy curry, dal, or chutney you like. We always go with the classic: turmeric-spiced potatoes and coconut chutney, along with some ghee. Perhaps I’ll cover those in a future post …but for now, enjoy the fact that you’ve mastered perhaps the most quintessential Indian breakfast dish!

Leftover dosa batter can be refrigerated and used for at least a week. Leftover steamed iddly freezes superbly—one of our favorite quick breakfasts is to slice the thawed iddly in half lengthwise and shallow fry them in a little oil.

Notes:

  • Iddly rice is not the same as regular rice. It is parboiled and very short-grained. Without going into too many science-y details, it’s much better for dosa/iddly because of the proteins it contains. All of these items are available at all Indian grocers–and for cheap cheap cheap! Stored well, they’ll last for months. Just look for skinned, whole urad dal if you can (it’s white and round). Like the iddly rice, it’s better for dosa than the split, unhusked version. Ask for help if you’re not sure—the staff should know exactly what you mean and will be happy to assist. You may feel intimidated at first, but I promise you no one cares if pronounce something wrong, or spend an hour meandering the aisles (speaking from experience here…).
  • Natural fermentation draws in (healthy) microbes from the air to act as your yeast and give the batter lift, which is vital in giving the final product its slightly tangy, light-as-air texture and taste—not to mention its health qualities. Unfortunately for many U.S. households, we have over-sterilized things so much that it can be difficult to grab these yeasts from the air, so here are my tips for ensuring success:
    • Do not over-rinse the grains; you don’t want to wash away all those wild yeasts already on the rice and dal!
    • Use the fenugreek seeds—these aid in grabbing extra yeast from the air. Pretty sure this tip has been around for hundreds of years. Indian grandmothers never steer you wrong.
    • Leave your bowls uncovered when soaking; again, more opportunities for new microbes to join the party. Better yet, leave the bowls near a houseplant, as they usually have good wild activity to draw from.
    • If you have sourdough starter handy, consider adding a spoonful to the soaking water as well—I find this immensely helpful in kickstarting life.
The first dosa (spinach) I ever had in India. I still dream of this.

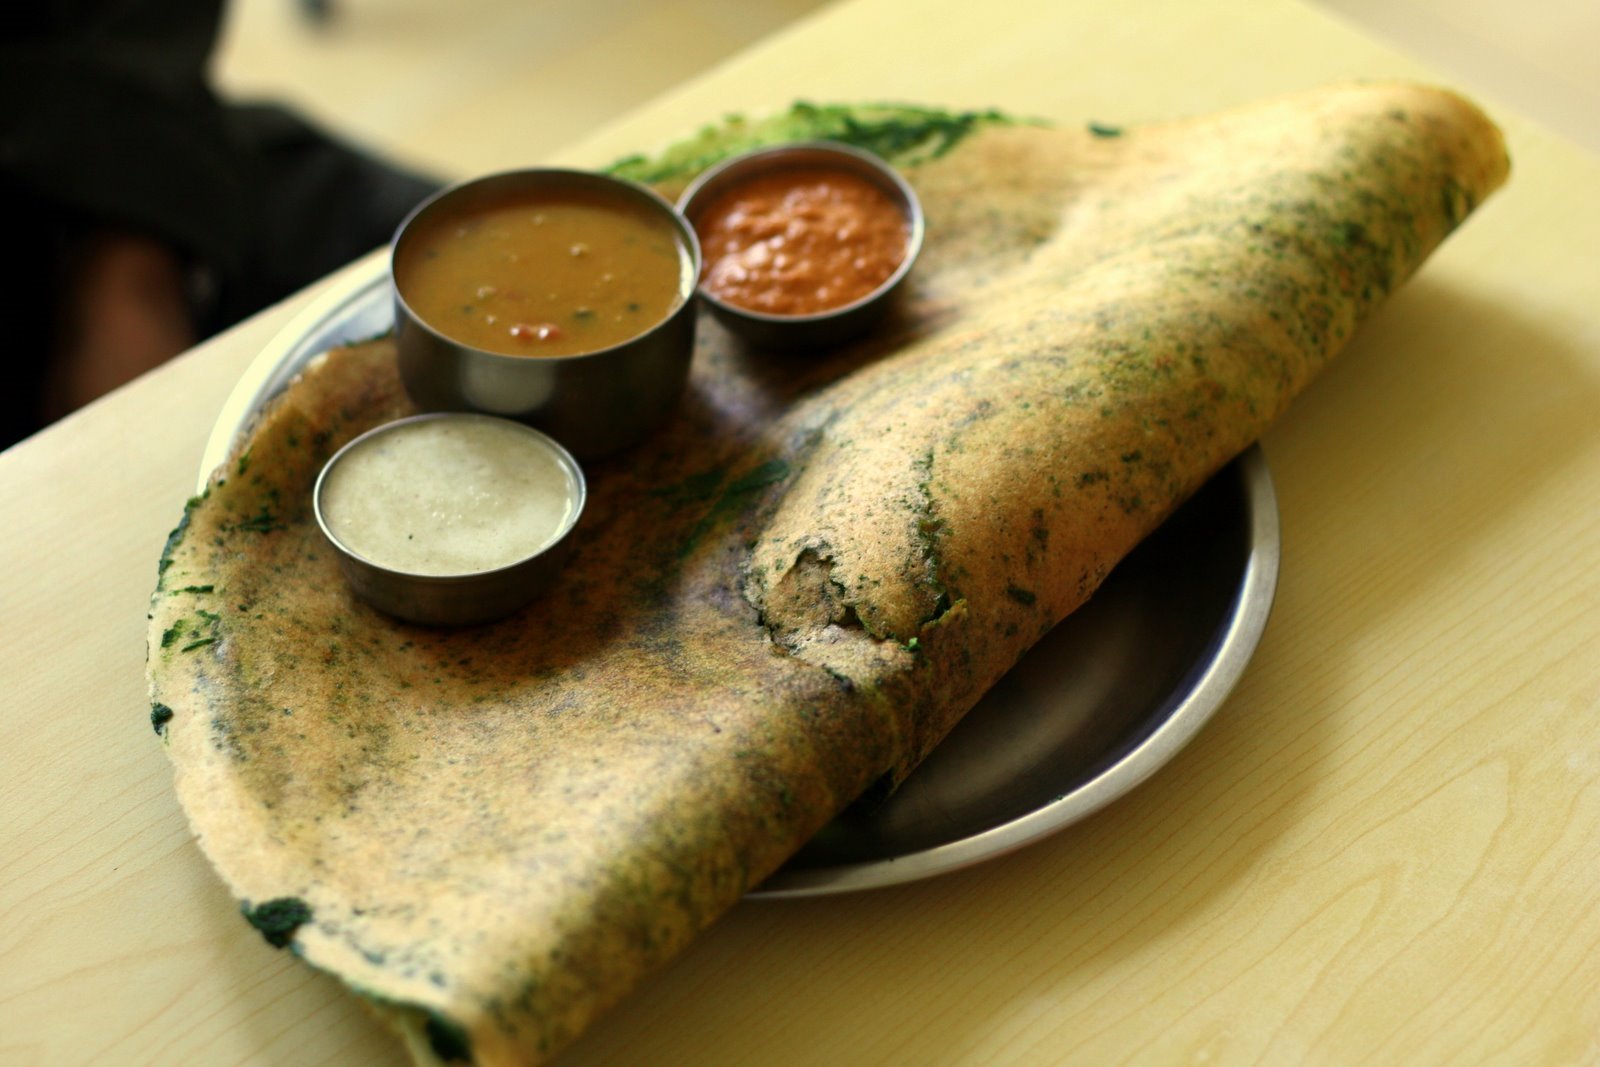
The first dosa I ever had in India. On the drive to Agra (home of the Taj Mahal), we stopped at this tiny little restaurant connected to a gas station, in the middle of nowhere. I ordered this spinach dosa and that.was.it.     Life, fulfilled.